How to Pick Up a Dropped Purl Stitch Tutorial

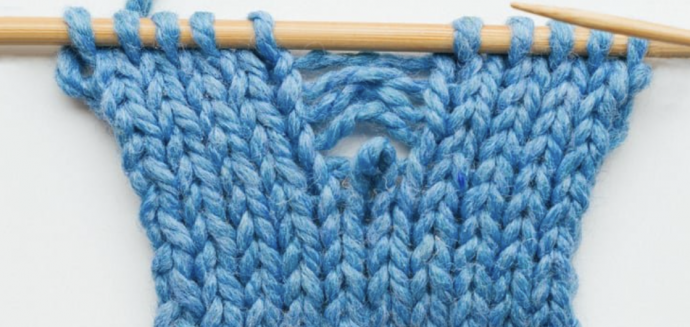
Discovering a dropped purl stitch in your knitting can be disheartening, as it unravels your hard work. However, fear not, for rectifying this mistake is simpler than it seems. Picking up a dropped purl stitch mirrors the process of fixing a dropped knit stitch, but in reverse.
The moment you notice the error, backtrack to where the stitch slipped. Equip yourself with a crochet hook, and you're ready to embark on the journey of guiding that errant purl stitch back up the yarn "ladder," securing it back in place on your needle. This endeavor is well-suited for intermediate knitters, and the required materials are minimal.
Instructions
Hook the Dropped Stitch
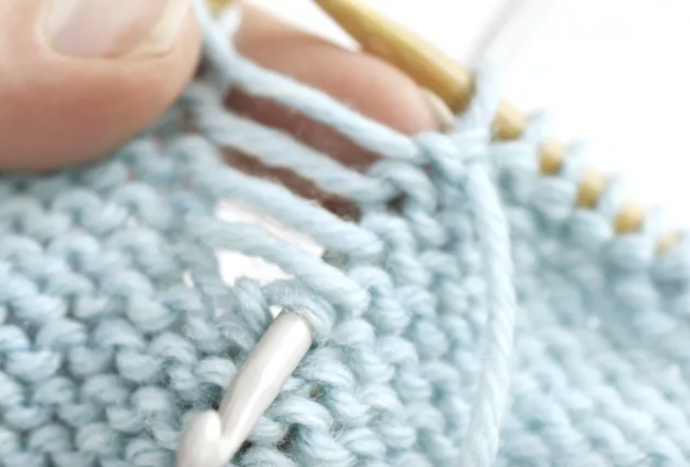
1. With the purl side of your knitting facing you, grab the loop of the dropped stitch with your fingers. Sometimes the loop is still close to the top, but other times a stitch runs down several rows. Either way, it helps pull the loop up and away from the cross strands.
Insert a crochet hook through the loop from back to front.
2. Catch the First Cross-Strand
Use the crochet hook to also catch the horizontal strand of yarn that's directly above the stitch on your crochet hook.
Keep the hook facing up as you loop the cross-strand. This makes it easier to continue rescuing that dropped stitch.
3. Pull the Strand Through the Loop
Pull the cross-strand through the loop of the dropped stitch. As you do, the first loop should drop off the end of the crochet hook, leaving the cross-strand as the new loop.
When you are pulling the strand through the loop, you may need to hold it in place on the hook with your non-dominant hand. Sometimes the yarn pushes and pulls so you just need to watch and make sure the correct loop is on the hook.
4. Work the Stitch up to the Top
Repeat the process of catching a horizontal strand and pulling it through the current loop until you reach the top of your work.
5. Place the Stitch on the Needle
Use the crochet hook to place the loop (your dropped stitch) back on the left needle.
When you slide the stitch onto the needle, be sure it is facing the correct direction so it is ready for your next purl. You don't want a twisted stitch in there.
6. Continue Purling
With your purl stitch back in place, you can continue purling (or knitting in some cases) across the rest of the row.
Now that your work is back to normal, you won't even notice where the dropped stitch was.
You might be alarmed when you find mistakes in your knitting, but it's best to stay calm and fix the errors as soon as you notice them. You'll be so much happier with your finished work when you do.


