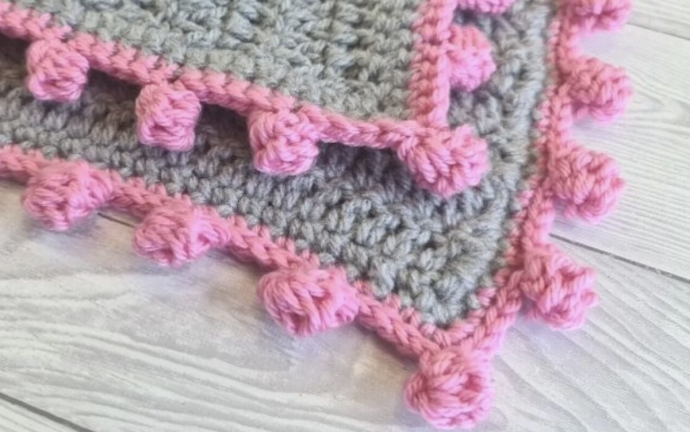
How to Crochet an Elegant Dot Border Stitch

Crocheting a border is an excellent way to give your project a finished look. The Dot Border crochet pattern is a simple and elegant way to add a little texture and charm to your work. This pattern involves creating a series of small dots or circles, which can be used to frame your project or add a decorative touch to the edges. With just a few basic crochet stitches, you can create a beautiful and unique border for your next crochet project. In this article, we will explore the Dot Border crochet pattern and provide step-by-step instructions to help you create your own.
Special Stitches
Double Crochet Bobble (dc bo) – A double crochet bobble is constructed with 5 incomplete double crochets joined together at the top.
Instructions
Step 1: Ch3, yo, insert hook into the 3rd ch from the hook and pull up a stitch (3 loops on hook).
Yo and pull through 2 loops on the hook (2 loops on the hook). Leave the loops on the hook and continue with the next step.
Step 2: Repeat step 1 four more times (you should have 6 loops on your hook).
Step 5: Yo and pull through all 6 loops on the hook. Sl st in the same stitch where you made the initial ch3.
TIP: If you don’t have the exact multiple of stitches in your edge, crochet more or less slip stitches in between the dots so the dots fall on the corners.
The section between ** is the section that needs to be repeated.
NOTE: Crochet one round of sc stitches around your edge in the same color. Starting from the corner, crochet 3sc in each corner and 1sc in each stitch. Don’t fasten off, continue with the next round.
Dot Border: Sl st in next (should be the corner stitch, the 2nd of the 3sc you made in the corner), dc bo, *sl st in next 5sts, dc bo*, repeat from * all around the border. Sl st to close the round, fasten off.


