Harvest Flower Blanket Crochet Pattern

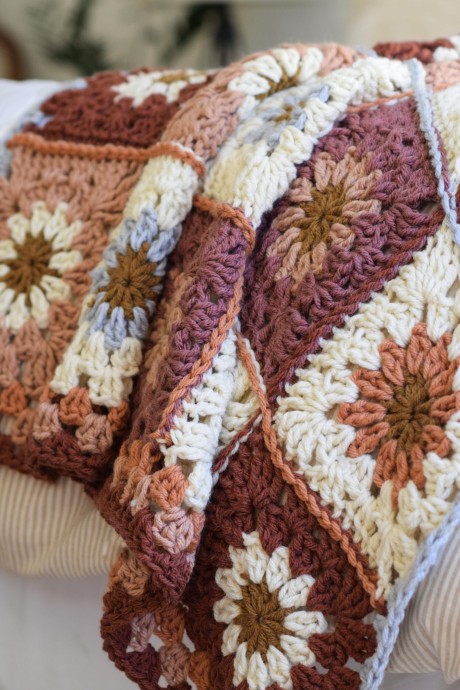
How about a beautiful, calming flower blanket crochet pattern today?
Made with my favorite easy flower granny square, this works up like a dream!
Learn how to crochet the Harvest Flower Blanket with this pattern.
Materials:
- 1 Lion Brand Yarn Hue + Me in Grapefruit
- 2 Lion Brand Yarn Hue + Me in Bellini
- 2 Lion Brand Yarn Hue + Me in Love Song
- 2 Lion Brand Yarn Hue + Me in Spicy
- 3 Lion Brand Yarn Hue + Me in Salt
- 1 Lion Brand Yarn Hue + Me in Arrowwood
- 1 Lion Brand Yarn Hue + Me in Ozone
- US size N 10.0 mm crochet hook
- US size P 11.0 or 11.5 mm hook (optional)
- Scissors
- Tapestry needle
- Measuring Tape
Size (approximate):
- 44” X 58”
Gauge:
- Each square should measure approximately 8” x 8” inches
Pattern Notes:
- You’ll crochet 30 flower granny squares that are worked separately and then seamed together following the instructions in the Assembly section. The squares are crocheted in joined rounds.
- Do not turn at the end of each round. To change colors, tie off, and join the new color (or use your preferred method). Feel free to customize your border or your seams! You may add more length and width to your blanket by crocheting extra squares or larger borders (keep yarn needs in mind!)
Abbreviations:
- ch – chain
- sp – space
- ch sp – chain space
- st – stitch
- dc – double crochet
- tr – treble crochet
- rep – repeat
- rnd – round
- sl st – slip stitch
Harvest Flower Blanket Crochet Pattern
*Use the size N 10.00 mm hook to crochet all squares. The larger hook is used for the flat slip stitch seam when the blanket is assembled.
Color Key:
- CREAM Salt (A)
- PINK Bellini (B)
- ORANGE Grapefruit (C)
- BLUE Ozone (D)
- BRICK Spicy (E)
- BROWN Arrowwood (F)
- PURPLE Love Song (G)
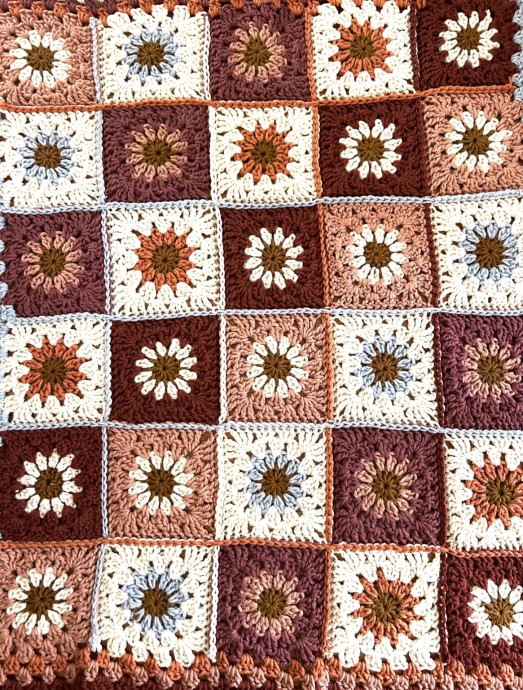
Make 6 of each square below:
- Square #1: Cream Flower with Pink Background: Rnd 1 F, Rnd 2 A, Rnd 3 – 4 B
- Square #2: Blue Flower with Cream Background: Rnd 1 F, Rnd 2 D, Rnd 3 – 4 A
- Square #3: Pink Flower with Purple Background: Rnd 1 F, Rnd 2 B, Rnd 3 – 4 G
- Square #4: Orange Flower with Cream Background: Rnd 1 F, Rnd 2 C, Rnd 3 – 4 A
- Square #5: Cream Flower with Brick Background: Rnd 1 F, Rnd 2 A, Rnd 3 – 4 E
Flower Square Pattern
(If you need a step-to-step tutorial see the previous post)
With your size N hook, Ch 3, join with sl st to form a ring.
Rnd 1 Ch 3 (counts as dc), 11 dc in ring, join with sl st in top of beg ch 3. Tie off. (12 sts total around)
Rnd 2 Join next color in any space between two stitches of Rnd 1, ch 3 (counts as dc), 1dc in same sp, *2dc in next sp between sts, repeat from * around, sl st to join in top of beg ch 3. Tie off. (24 sts total around)
Rnd 3 Join next color in any space between groups of 2 stitches, ch 3 (counts as st), 2dc in same sp, *3dc in next sp between pair of 2 sts, repeat from * around, sl st to join in top of beg ch 3. (36 sts total around)
Rnd 4 Ch 3 (counts as st), 2dc in same sp, 3dc in next sp between groups of 3 sts, (3tr, ch2, 3tr) in next sp between groups of 3 sts which is the corner of the square, *3dc in next 2 spaces between groups of 3 sts, (3tr, ch 2, 3 tr) in next sp between groups of 3. Repeat around, sl st to join in beg ch 3. Tie off. Weave in all those ends! Next, move onto Assembly.
Assembly
Using the larger hook if needed, sew your squares together as shown below using a flat slip stitch seam. You may use any yarn colors that you like! Feel free to modify your seaming method as well. Note that the larger hook may be used for the seams as they can tend to be tight and pull the fabric together. Adjust your tension or hook if necessary.
Place your flowers together as pictured and seam with a flat slip stitch seam (or your preferred seaming method)
Border (optional)
Using your leftover yarn and size N hook, make 3 dc in each space around blanket. In each corner make 3 dc, ch2, 3dc. If the blanket border starts to be wavy, you may need to work only 2 sts, rather than 3 stitches into some of the spaces. Work one round or more as desired. You can add more length and width to the blanket with the border edges. Tie off and weave in ends. Block if desired. Feel free to add tassels or poms as well!
That’s it!!

