Interlocking Shell Crochet Stitch Tutorial

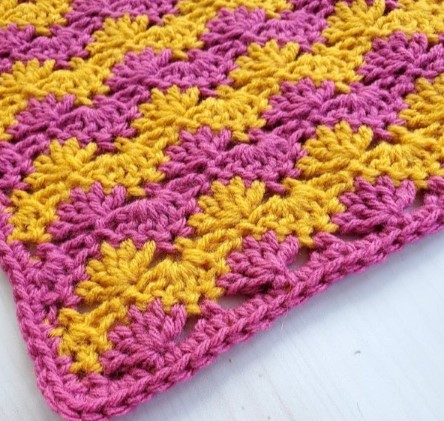
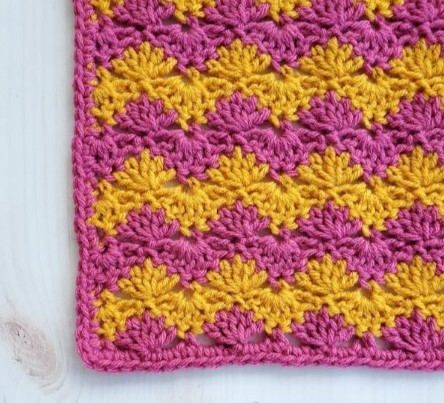
Today we are learning to crochet the interlocking shell stitch. This stitch features rows of shells and clusters that create a unique ripple pattern.
This fun stitch would be suitable for a variety of different projects: hats, scarves, blankets and more! I changed color every 2 rows for mine (mainly so I could carry my yarn up the side of the square) but it also looks nice in solid colors and stripes every row.
The thing I like about this stitch is it has a ripple or wave effect but has flat edges! This makes it easy to add any border you may want.
Learn how to crochet the Interlocking Shell Stitch with this tutorial.
Materials
- #4 Worsted Weight Yarn
- 5.5mm crochet hook
- Needle to weave in ends
- Scissors
Gauge and Sizing
- Gauge: Shell to shell or sc to sc (measured center to center) x 4 rows = 2 inches
- Finished: 12×12
Abbreviations
- Ch(s): chain(s)
- Dc: double crochet
- Sc: single crochet
- St(s): stitch(es)
- Sl st: slip stitch
- Dc5tog: double crochet 5 stitches together
Notes
- Ch 3 counts as 1 dc
- I changed color after each odd-numbered row and carried yarn up side
- To make this bigger or small chain any multiple of 6+1+3
- Don’t make your chains in even rows too tight.
Interlocking Shell Stitch Crochet Afghan Square Pattern
Ch 40 to start
Row 1: 2 dc in 4th ch from hook, skip 2 chs, sc in next, *skip 2 chs, 5 dc in next, skip 2 chs sc in next, repeat from * across until 3 sts remain. Skip 2 chs 3 dc in last. Turn
Row 2: Ch 1, sc in same st as ch 1, *ch 2, Dc5tog over next 5 sts, ch 2, sc in next. Repeat from * across. Turn.
Row 3: Ch 3, 2 dc in same st as ch 3, sc in top of next dc5tog, 5 dc in next sc, sc in top of next dc5tog, repeat from * across 3 dc in last. Turn.
Row 4-20: repeat rows 2 and 3 until block is square, ending on a row 2. Continue to border
Border
Rnd 1: ch 1 sc evenly around placing 3 sc in each corner stitch, join to top of 1st sc with sl st.
Repeat until piece is 12 in, block if desired.


