Treble Cross Crochet Stitch Photo Tutorial


If you’re looking for a tall, lacy stitch that holds form without a ton of blocking, you’ll love the Treble Cross Stitch (also known as the K Stitch).
Perfect for light weight summer garments or pretty lace home decor and surprisingly fun to crochet once you know the steps, this tall X-shaped stitch has definitely become one of my favorites.
Learn how to crochet the Treble Cross Stitch with this photo tutorial.
Treble Cross Stitch Instructions
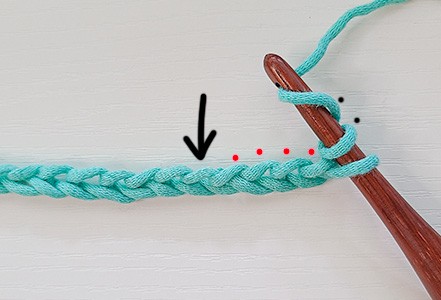
To begin working a Treble Cross stitch, we chain a multiple of 4 + 1. Here I have 25 chains.
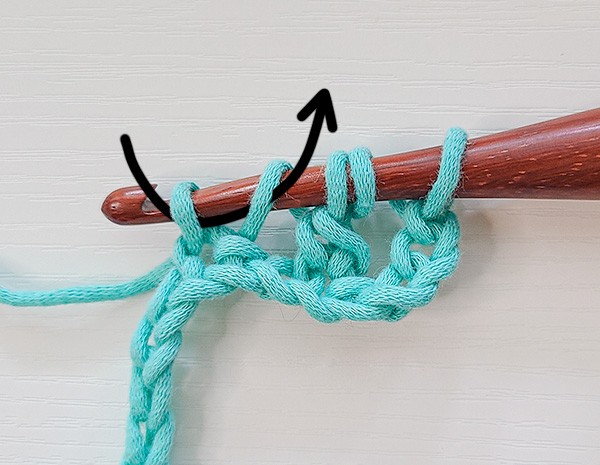
We will yarn over 2 times (black dots indicate 2 yarn overs) and insert our hook into the 5th chain from the hook.
The 4 skipped chains are marked with red dots. These 4 chains will count as the first treble crochet of the row.
With the hook inserted into the 5th chain, yarn over and pull a loop through.
You will have 4 loops on your hook.
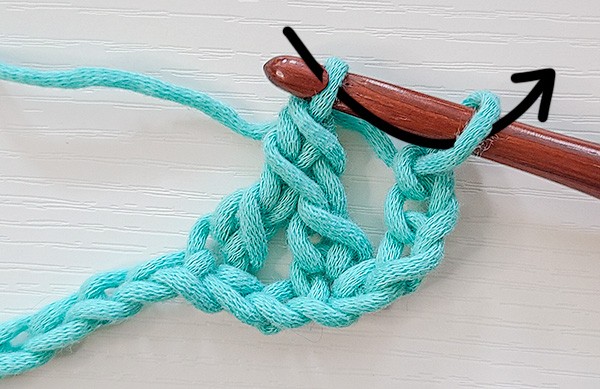
Yarn over and pull through 2 loops as the black arrow in the image indicates.
You will now have 3 loops on hook and one “leg” made.
Notice that this looks like a partially finished double crochet (if we were to only have 2 loops on hook and not 3).
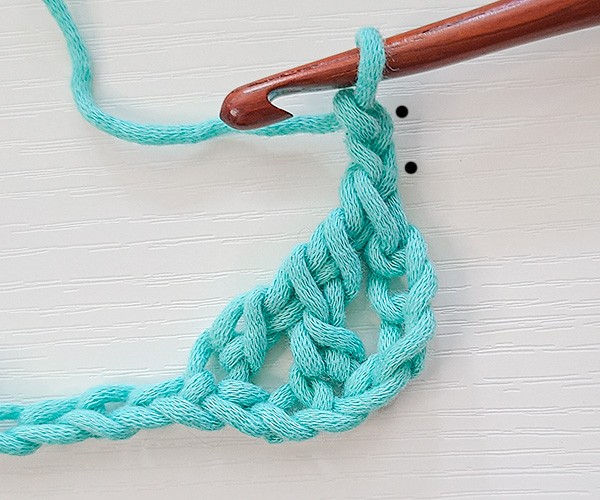
Now, skip 2 chains (marked with 2 red dots in the image).
Yarn over and insert your hook into the next chain. Then, yarn over and pull a loop through.
You will now have 5 loops on hook.
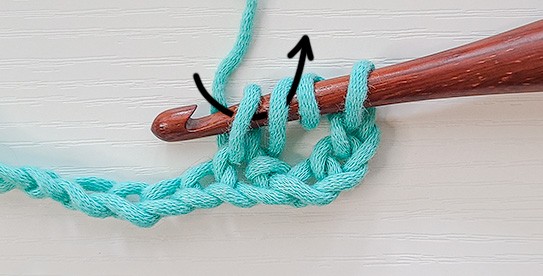
Yarn over and pull through 2 loops as the black arrow indicates.
We now have 4 loops on hook and 2 “legs” made.
Notice that these two “legs” look like we are crocheting 2 double crochets together. This is important to note as it is a part of the stitch anatomy and helps us to identify the area we will need to work into later.
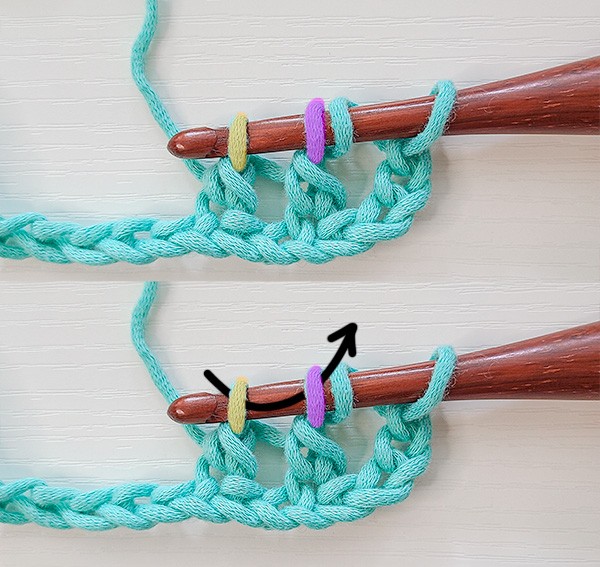
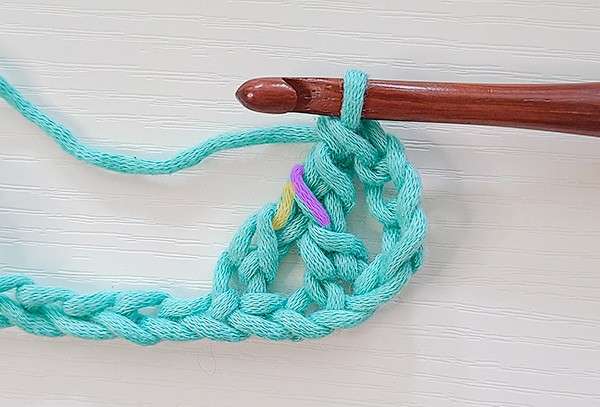
In both of these images, I’ve highlighted the loop nearest to the tip of the hook in yellow and the next loop in pink. The yellow loop is the loop that belongs to the 2nd leg. The pink loop is the loop that belongs to the first leg.
These are the 2 loops we will work into later.
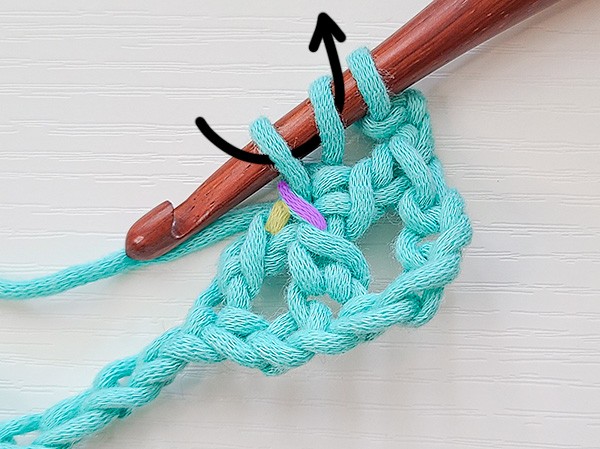
For now, yarn over and pull through 2 loops as the black arrow indicates.
You will now have 3 loops on hook.
If we were to ignore the 2 loops on hook to the right, we would have a double crochet 2 together (dc2tog).
See how the yellow and pink loop have gathered together and sit diagonally in the top image. These are what we will look for later.
In the bottom image, I’ve placed black arrows over the two legs. This is to help identify that these are the “legs” that create the upside down V on the bottom of the X.
Yarn over and pull through 2 loops as the black arrow indicates.
You will have 2 loops on hook.
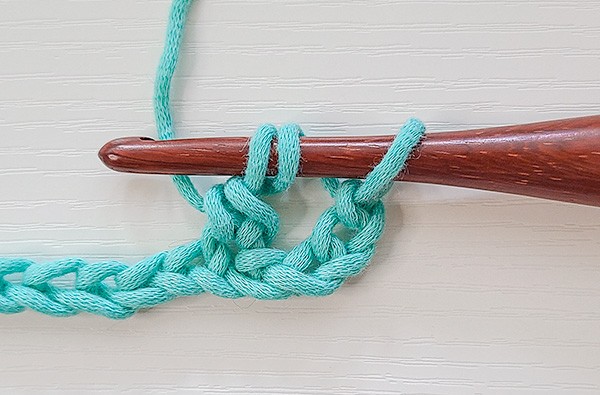
Yarn over and pull through the remaining 2 loops as the black arrow indicates.
This is what the stitch looks like so far. I’ve highlighted the two loops we will need later in yellow and pink again.
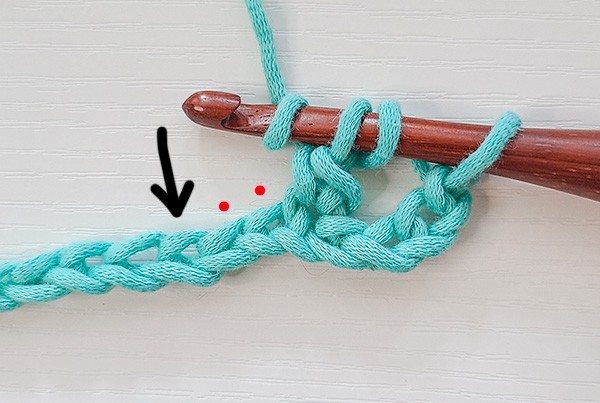
Now chain 2. This chain 2 creates the same amount of space between the top part of the stitch as we have in the bottom of the stitch from skipping 2 chains.
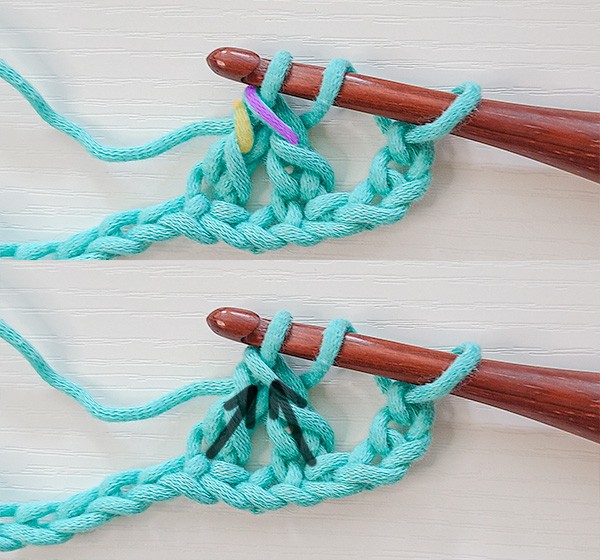
Now yarn over once (as indicated by a black dot).
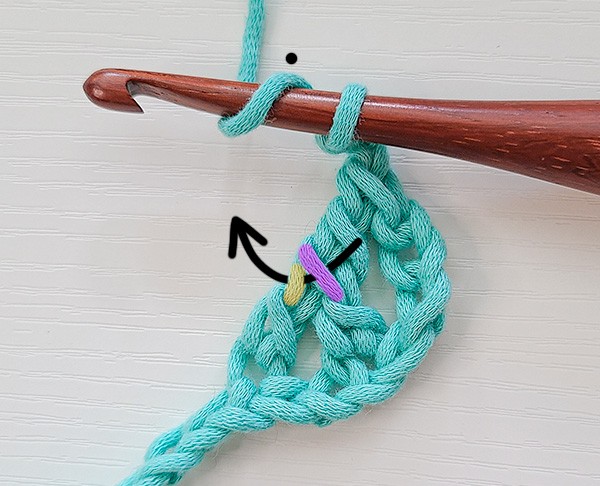
Identify the 2 loops where the two legs were crocheted together. I’ve highlighted them yellow and pink in this image.
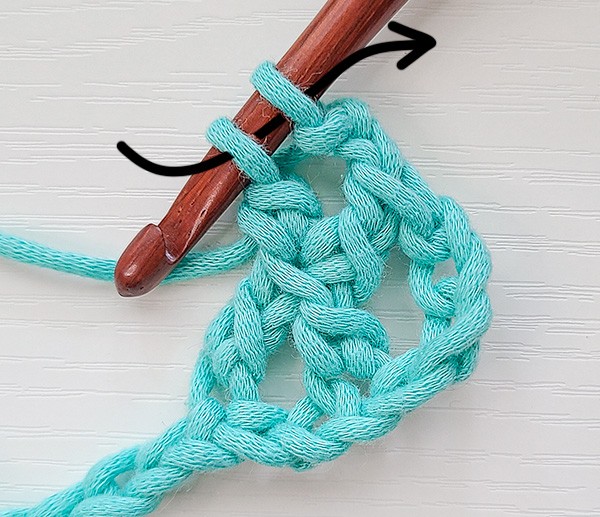
Insert your hook under these two diagonal loops from right to left (or left to right, if you’re left handed) as the black arrow in the image indicates.
Then, yarn over and pull a loop through.
You will have 3 loops on your hook.
Yarn over and pull through 2 loops as the black arrow indicates.
I’ve kept the 2 loops we have pulled this loop through highlighted yellow and pink so we can be aware of the stitch anatomy.
You will have 2 loops on your hook.
Yarn over and pull through 2 loops as the black arrow indicates.
This completes the crochet Treble Cross Stitch!
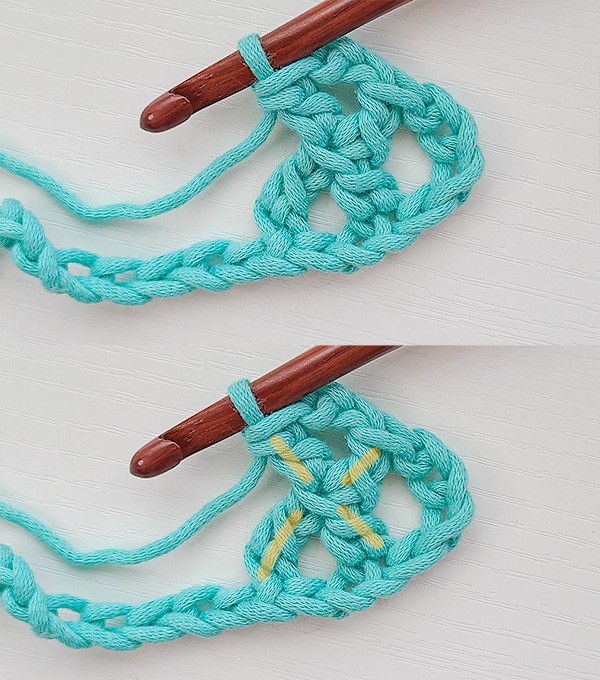
The two pictures in this image are the same. I’ve highlighted the bottom image for clarity.
You can see in both images how this stitch looks like an X.
In the bottom image, I’ve highlighted the 2 posts or legs of the bottom of the X and the 2 arms of the top of the X.
This helps to show how all of this work came together and to understand the stitch anatomy.
Look at your own Treble Cross Stitch you’ve created and study where the diagonal loops of the yarn overs are. Notice that each leg, post or arm has 1 diagonal loop that is unworked and, in the center of the X, there is one diagonal loop. When the Treble Cross Stitch is worked properly, all of these loops will be balanced like this.
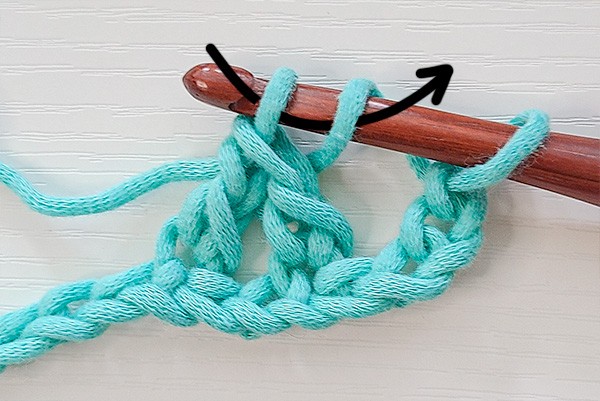
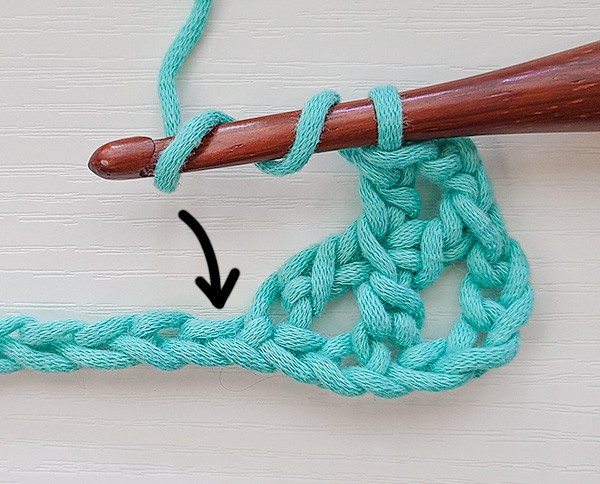
To begin your next crochet Treble Cross stitch, you would yarn over twice and insert your hook into the next chain.
Then, follow the steps listed out above to finish the stitch.
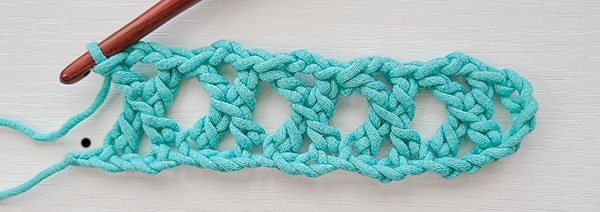
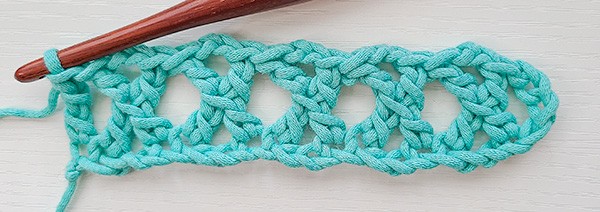
When you reach the end of the row, you will have 1 stitch remaining. In this stitch, you’ll place a normal treble crochet.
With the treble crochet placed, this is what a row working the Treble Cross stitch all the way across will look like.