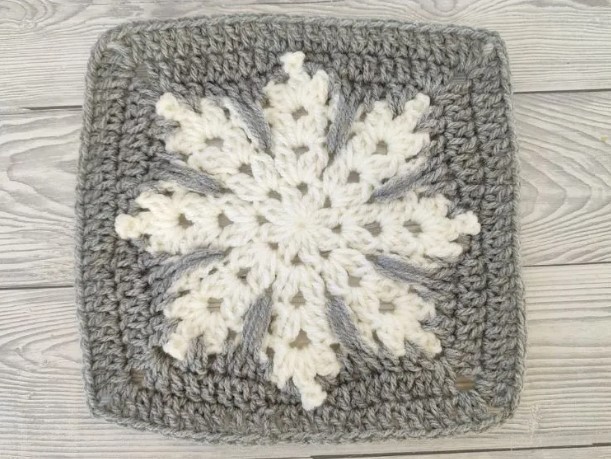
Crochet Snowflake Square Photo Tutorial

This Snowflake Square is easy to make and looks gorgeous when turned into blankets, afghans, shawls, hats, or cardigans today I will show you how to crochet it.
You can make it as big as you want by simply crocheting more rounds, I only made it big enough so the tips of the snowflake won’t go over the edge.
Learn how to crochet the Snowflake Square with this photo tutorial.
Materials
- Marriner Yarn Aran in gray and white
- 5mm crochet hook
Size
- 25cm x 25cm
Abbreviations
- magic ring
- ch – chain
- yo – yarn over
- sl st – slip stitch
- sc – single crochet
- dc – double crochet
- pst – picot stitch
- Ldc – long double crochet
- dc cl – double crochet cluster
Special Stitches
Picot Stitch (pst) – ch3, sl st in the base stitch (NOT the base chain) by inserting the hook through the middle of the stitch and behind the loops.
Double Crochet Cluster (dc cl) – *yo, insert hook in the ch space, yo and pull up a loop, yo and pull through only the first 2 loops on the hook* x 2, yo and pull through all the 3 loops on the hook.
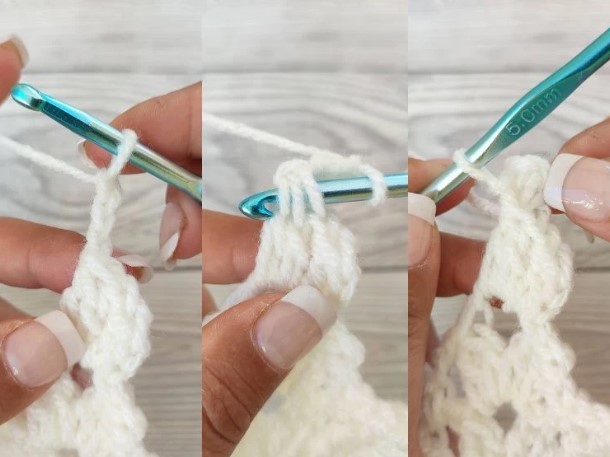
Long Double Crochet (Ldc) – A long double crochet is made just like the regular one, except you insert the hook 2 spaces below and pull a long loop.
Notes
- ch3 at the beginning of the row counts as a dc stitch
- stitches contained within * * are the repeat section for that row
- stitches contained within ( ) are made in the same space
Instructions
With White yarn and a 5mm hook, create a magic ring.
Round 1: Working in the magic ring, ch2, dc, ch2, *dc cl, ch2* x 7, sl st to close the round. Pull the magic ring tail to close the hole shut.
Round 2: Sl st in next ch2 space, (ch2, dc, ch2, dc cl) in the same ch2 space, *(dc cl, ch2, dc cl, ch2) in the next ch2 space* x 7, sl st to close the round.
Round 3: Sl st in next ch2 space, (ch2, dc, ch3, dc cl, ch2) in the same ch2 space, sc in next ch2 space, ch2, *(dc cl, ch3, dc cl, ch2) in next ch2 space, sc in next ch2 space, ch2* x 7, sl st to close the round.
Round 4: sl st in next ch3 space, (ch2, dc, ch1, dc cl, pst, ch1, dc cl, ch2) in the same ch3 space, *sc in next ch2 space* x 2, ch2, *(dc cl, ch1, dc cl, pst, ch1, dc cl, ch2) in next ch3 space, sc in next ch2 space, sc in next ch2 space, ch2* x 7, sl st to close the round.
Round 5: Change colors to Gray. Join the gray yarn by pulling a loop of gray yarn through the white loop and ch1, cut the white yarn and pull the tail to close the white loop.
*(2Sc) in next ch1 space, push the picot stitch in front and (2sc) in next ch1 space, dc in next ch2 space, (2ldc) in the ch space below on R2, dc in next ch2 space, (2dc) in next ch1 space, ch1, push the picot stitch in front and (2dc) in next ch1 space, dc in next ch2 space, (2ldc) in the ch space below on R2, dc in next ch2 space* x 4, sl st to close the round.
Round 6: Ch1, starting from the stitch where you sl st, *sc in next 4 stitches, dc in next 6sts, (2dc, ch2, 2dc) in next ch1 space, dc in next 6sts* x 4, sl st to close the round.
Round 7: Ch3 (counts as a dc), dc in next 11sts, (2dc, ch2, 2dc) in next ch2 space, *dc in next 20sts, (2dc, ch2, 2dc) in next ch2 space* x 3, dc in next 8sts, sl st at the top of ch3 to close the round, fasten off and weave in all the ends.
That's it!


