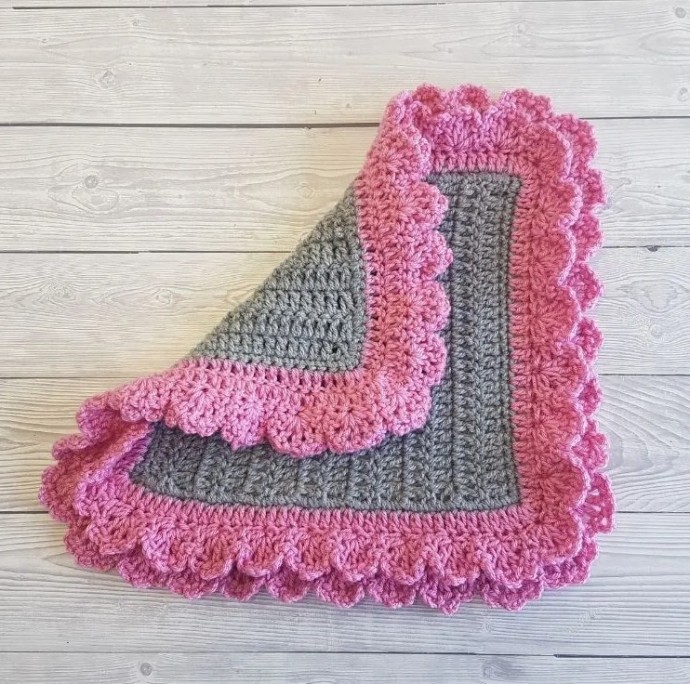
Crochet Layered Scallops Border Photo Tutorial

The Layered Scallops Border is curly, busy, and frames beautifully a blanket that is plain and made with simple stitches. You can crochet as many layers as you like.
It doesn’t require a special pattern for corners and that makes it a beginner-friendly pattern that can be adjusted to any project. All you have to do is match a scallop in each corner, the rest is adjustable.
It works great for any kind of edge, from square and rectangle projects such as blankets and afghans to triangle edges such as shawls or straight edges such as scarves. You can even crochet it on a round edge such as a dress.
Learn how to crochet the Layered Scallops Border with this photo tutorial.
Materials
- Marriner Yarns Aran
- 5mm crochet hook
Abbreviations
- st(s) – stitch(es)
- ch(s) – chain(s)
- sk – skip
- yo- yarn over
- sl st – slip stitch
- dc – double crochet
- dc blo – double crochet in the back loop only
- flo – working in the front loop only
Notes
- The pattern is divided into 2 parts: the base rows and the scallops rows that are crocheted on the base rows. To make multiple layers, crochet more base rows.
- TIP: this border was designed to be curly and fluffy, if you want the layers to be flatter, then skip 2sts instead of one
- this border requires you to have multiples of 4sts + 1st on each side, including the corner stitches
- the section between ** is the section that needs to be repeated (ex: *dc, sc* x 3 – repeat the (dc, sc) sequence three times)
- ch3 at the beginning of rows counts as a double crochet.
- this border is crocheted in the round without turning, each round is closed with an sl st
Instructions
Round 1 (Base Row):
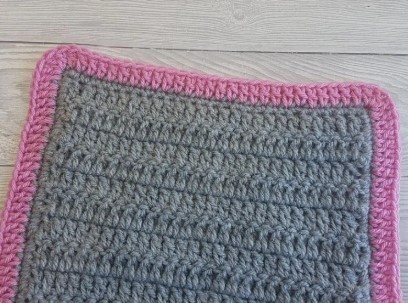
Join in the corner with a slip knot and ch3 (counts as a dc), 2dc in the same corner stitch, dc in each stitch along the edge until you reach the next corner stitch, *3dc in the corner stitch, dc in each stitch along the edge until you reach the next corner stitch* x 3, sl st at the top of ch3 you made at the beginning of the round.
NOTE: If you want just one layer of scallops, jump straight to round 3 (scallop layer).
Round 2 (Base Row): ch3 (counts as a dc), 3dc blo in the following st (which is the corner stitch), dc in each stitch along the edge until you reach the next corner stitch, *3dc blo in the corner stitch, dc blo in each stitch along the edge until you reach the next corner stitch* x 3 (note, on the last edge, you make dc blo in each stitch until you reach the ch3 you made at the beginning of the round), sl st at the top of ch3 to close the round. fasten off and weave in the ends.
NOTE: Repeat Round 2 as many times as you want layers on your border. Each base row holds a row of scallops.
Round 3 (Scallops Layer): Join with a slip knot on the Round 1 (Base Row)’ exposed front loops, 2 stitches before the corner stitch.
NOTE: The entire row is crocheted in the exposed front loops from round 1 (base layer)
*Sk1, in the next st make (dc, ch1, dc, ch1, dc, ch1, dc, ch1, dc), sk1, sl st*, repeat around the base row until you reached the first scallop you made, finish with an sl st in the same front loop you started the round.
Round 4 (Scallops Layer): move the yarn into the scallop by sl st in the first ch1 space of the scallop (between the 1st and 2nd dc of the scallop).
*Ch4, sl st in the next ch1 space on the scallop, ch4, sl st in the next ch1 space on the scallop, ch4, sl st in the next ch1 space on the scallop, ch2, sl st into the next ch1 space of the following scallop*, repeat on each scallop around until you have reached the beginning of the round, fasten off and weave in the ends.
Repeat rounds 3 & 4 on each base round you have previously crocheted.
On the last base round, crochet through the entire stitch.


