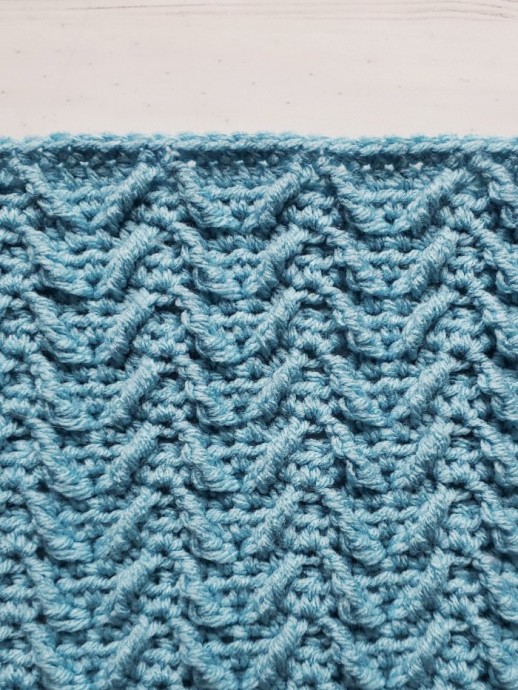
Raised Herringbone Crochet Stitch Tutorial

The raised herringbone crochet stitch is worked using post stitches on the diagonal and creates an interesting raised zig-zag pattern on your project.
I think this stitch would be prefect to use on just about any project you wanted an all-over textured pattern on. A hat, baby blanket, or pillow cover is what comes to my mind first.
Learn how to crochet the Raised Herringbone Stitch with this tutorial.
Abbreviations:
- Ch(s): chain(s)
- St(s): stitch(es)
- Sc: single crochet
- Hdc: half double crochet
- Fpdtr: front post double treble crochet
Notes:
- Ch 1 does not count as stitch
- leave stitch behind fpdtr unworked.
- All post stitches are made 2 rows below current row.
Instructions:
Ch multiple 6+3
Row 1: Hdc in 2nd ch from hook and each ch across. Turn.
Row 2: Ch 1, hdc in same st as ch 1 and each st across. Turn.
Row 3: Ch 1, hdc in same st as ch 1, Skip first 3 hdc 2 rows below. *FpDtr in next st 2 rows below. Hdc in next 4. FpDtr 2 rows below around stitch to left of previous FpDtr. Skip next 4 sts 2 rows below after FpDtr just made. Repeat from * across ending last repeat after final FpDtr. Hdc in last. Turn.
Repeat rows 2+3 until project is desired size

