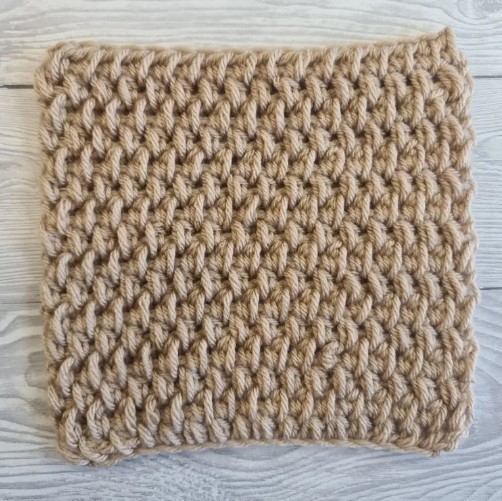
How to Crochet the Herringbone Puff Stitch Photo Tutorial

The herringbone pattern has been made in many stitch variations over the years, today I will show you how to crochet the Herringbone Puff Stitch.
The Herringbone Puff Stitch uses a simple puff stitch to create the classic herringbone design in a thick and warm fabric that has a wonderful bobbly texture.
It works great for baby blankets, afghans, bags, garments, and other accessories.
Learn how to crochet the Herringbone Puff Stitch with this photo tutorial.
Materials:
- Marriner Yarns Aran
- 5mm crochet hook
Abbreviations:
- st(s) – stitch(es)
- ch(s) – chain(s)
- sk – skip
- yo- yarn over
- mini puff st – mini puff stitch
Special Stitches:
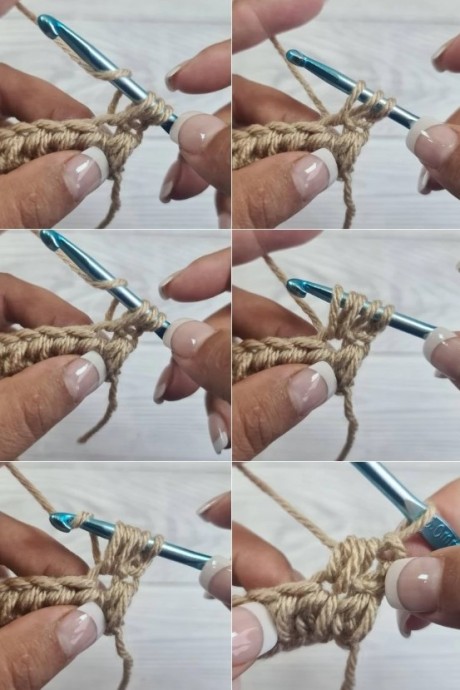
Mini Puff Stitch (mini puff st): Mini puff stitches can be made as big or small as you like, this pattern uses mini puff stitches made with 2 loops.
Yo, insert your hook into the ch (or in the space between the mini puff sts below, depending on where the pattern instructs you to do so), yo and pull up a loop, yo, insert hook into the same place, yo and pull up a loop (5 loops on your hook), yo and pull through all loops on the hook.
Notes:
- chain 2 at the beginning counts as a stitch
- stitches contained within ** are the repeat section for that row
- TIP: make your starting chains loose, the mini puff stitches will make the row wider than it is initially
Instructions:
Starting Chain: This pattern doesn’t require any multiples, make as many chains as you need. My starting chain is 18ch.
Row 1: Mini puff st in 3rd ch from the hook, mini puff st in each of the remaining chains (you will end up with 16 mini puff stitches), turn.
Row 2: ch2, mini puff stitch between the 1st and 2nd mini puff stitch below, mini puff stitch in every space between the mini puff stitches below.
NOTE: Right at the end, make your last mini puff stitch in between the last mini puff stitch and the ch2 you have skipped at the beginning of row 1.
Repeat row 2 until you have the required length.


