Spike Stitch Crochet Edging Photo Tutorial

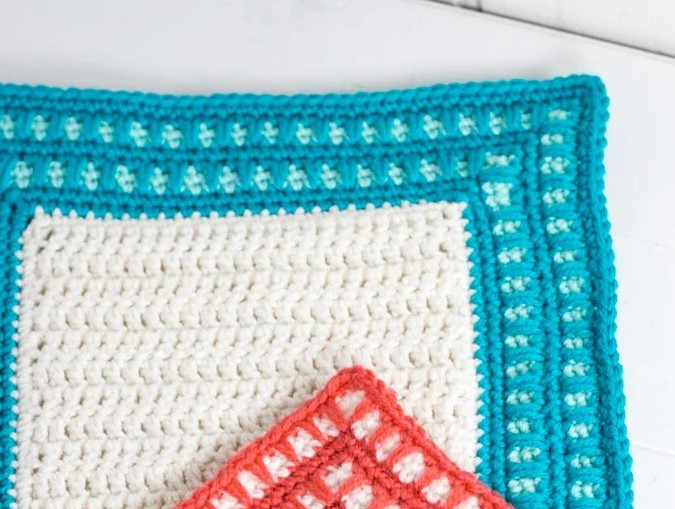
Every blanket needs a beautiful crochet border. This crochet edging is a great addition to any blanket and will work for any blanket.
For the Spike Stitch Border all we will need is an odd number of stitches on each side of the blanket (not including the corner stitches). Don’t worry if your stitch count isn’t odd on every side yet, we can correct the stitch count during our first row of the border.
This border looks great with just one row of Spike Stitches worked or with several rows. The back side of this border looks very similar to the front side.
Learn how to crochet the Spike Stitch Edging with this photo tutorial.
Abbreviations
- CH- Chain
- SC – Single Crochet
- SpSC – Spike Single Crochet
- ST – Stitch
- SLST – Slip Stitch
- SC2TOG – Single Crochet 2 Stitches Together (Only used to correct the stitch count)
Special Stitches
SC2TOG – Single Crochet 2 Stitches Together – Insert your hook into the next stitch, yarn over, pull the loop through the hook (2 loops on hook), insert hook into the next stitch, yarn over, pull the loop through the hook, (3 loops on the hook) yarn over and pull the first loop through all the loops on the hook. Your decrease is complete.
Notes
- The turning chain does not count as a stitch.
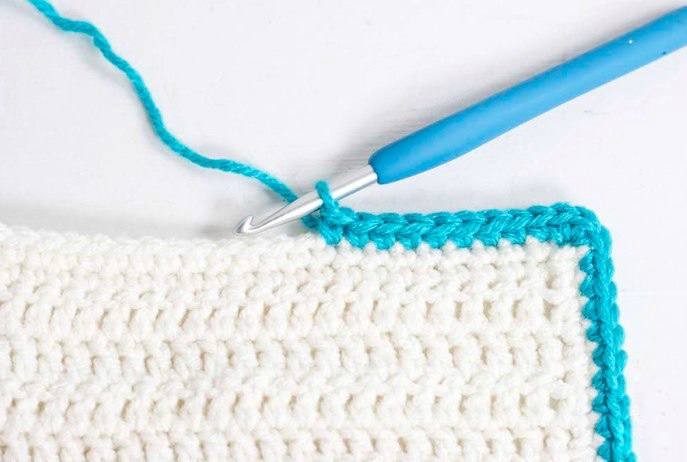
- Before starting this border, work a single crochet border around the entire blanket.
- This border only has two many types of rows, a Single Crochet row and a Spike Single Crochet rows worked in a pattern.
- Pattern is worked in joined rounds and is not turned at the end of the rows.
- Use a stitch marker to mark the center SC of each corner. This will be the corner stitch that you will work your next set of 3SC into in the next row.
- Use the same yarn and hook size that was used with the blanket the border is for.
- Be careful not to add extra stitches at the end or beginning of a row.
- The stitch count will increase by 2 on each side of the blanket for each row.
- You can carry your yarn up the back of your work but it will leave a small noticable strand of yarn. I recommend that you cut your yarn and weave in your ends every time you change colors.
Instructions
Start with the main border color (the color the spike stitches will be made with).
Row 1: SLST to any corner, CH1, Work 2 SC into the same corner, SC into each ST down the side of the blanket until you reach the next corner, *Work 3 SC into corner CH, SC into each ST down the next side of the blanket until you reach the next corner,* repeat from *to* a total of 3 times. Work 1 SC into the first corner, SLST to first SC.
Note (Correcting your stitch count): During row one, you will want to count your stitches after working the corner (do not count the corner stitches), when you reach the next corner if you have an even number of stitches, pull out 7 stitches and work a SC2TOG then finish up the row. This will correct the stitch count for that side. Repeat this process for all the sides.
Row 2: CH1, Work 2 SC into the same ST as the SLST, SC into each ST down the side of the blanket until you reach the next corner, *Work 3 SC into corner ST, SC into each ST down the next side of the blanket until you reach the next corner,* repeat from *to* a total of 3 times. Work 1 SC into the first corner, SLST to first SC.
Change to Accent Color.
Row 3-4: CH1, Work 2 SC into the same ST as the SLST, SC into each ST down the side of the blanket until you reach the next corner, *Work 3 SC into corner ST, SC into each ST down the next side of the blanket until you reach the next corner,* repeat from *to* a total of 3 times. Work 1 SC into the first corner, SLST to first SC.
So far all we have done is worked 4 single crochet rows. Now we will work a row of spike stitches.
Change to Main Color.
Row 5: CH1, Work 2 SC into the same ST as the SLST, SC into next ST, *SpSC into the stitch 2 rows below the next ST, SC in next ST* repeat from *to* until you reach your corner ST. Work 3 SC into corner ST, SC in next ST *SpSC into the stitch 2 rows below the next ST, SC in next ST* repeat from *to* until you reach next corner ST. Work 3 SC into corner ST, SC in next ST *SpSC into the stitch 2 rows below the next ST, SC in next ST* repeat from *to* until you reach your corner ST. Work 3 SC into corner ST, SC in next ST *SpSC into the stitch 2 rows below the next ST, SC in next ST* repeat from *to* until you reach your corner ST. SC in first corner, SLST to first SC.
Row 6-9: Repeat rows 2-5.
At this point you can repeat rows 2-5 again or you can finish off with last row. It is up to you how wide you would like the border to be.
Last Row: CH1, Work 2 SC into the same ST as the SLST, SC into each ST down the side of the blanket until you reach the next corner, *Work 3 SC into corner ST, SC into each ST down the next side of the blanket until you reach the next corner,* repeat from *to* a total of 3 times. Work 1 SC into the first corner, SLST to first SC. Fasten off and weave in your ends.


