How to Crochet on Both Sides of a Foundation Chain Tutorial

Knowing how to crochet on both sides of a foundation chain is a critical skill for crocheters to know. You’ll need to know this skill to make an oval shape, commonly used in amigurumi projects, as slipper and baby shoe soles, bag bottoms and more.
In this tutorial I’ll show you how to crochet on both sides of your foundation chain and how different ways you work into that chain can impact the final look of your piece.
Materials Required:
- Before we get started, let’s take a look at the materials you’ll need for this project:
- A crochet hook in whatever hook size works best with the yarn you’re using
- Yarn in the yarn weight of your preference
- Stitch Marker
- Sample Pattern (Below)
Sample Pattern:
Abbreviations:
- CH = Chain
- RS = Right Side
- SC = Single Crochet (<–click link for tutorial)
- SCINC = Single Crochet Increase / 2 Single Crochet Stitches Worked into the Same Stitch (<–click link for tutorial)
- SL ST = Slip Stitch
- ST(s) = Stitch(es)
- WS = Wrong Side
Instructions:
CH 9.
Round 1: SCINC in the 2nd CH from the hook. SC in the next 6 CHs, work 3 SC in the last CH. Working on the other side of the chain, SC 7. (18)
Round 2: SCINC x 2, SC 6, SCINC x 3, SC 6, SCINC. (24)
How to Crochet on Both Sides of a Foundation Chain
Creating your Foundation Chain
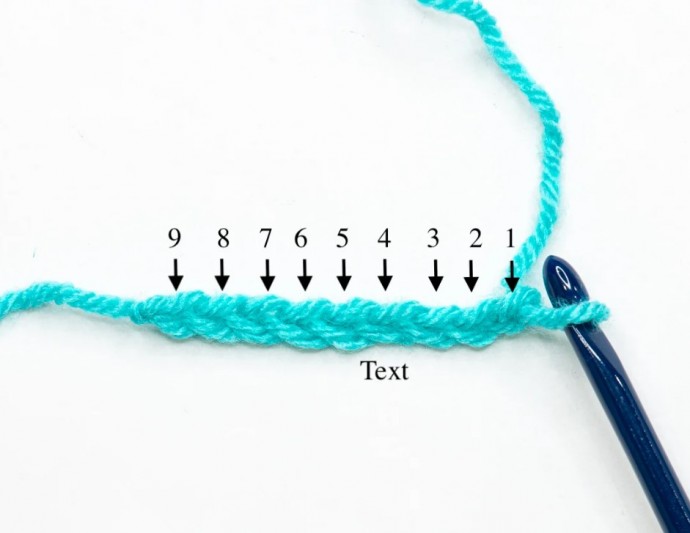
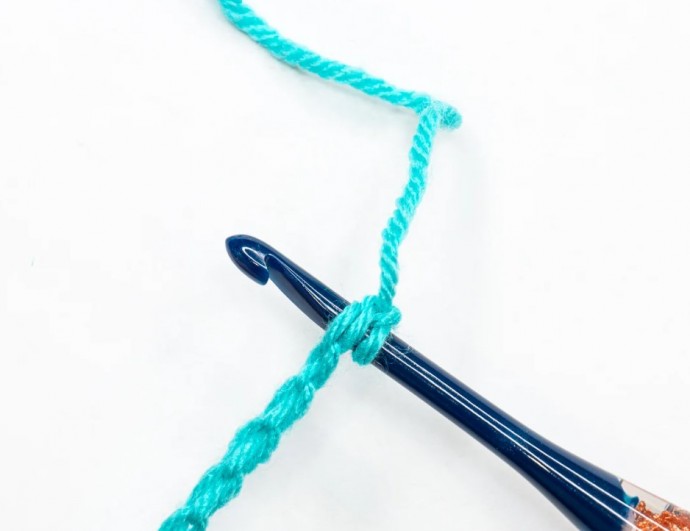
Create a chain with your desired number of chain stitches. In our pattern example, we have a CH 9.
Place your first stitches in the second chain (2nd ch) from the hook (you never work into the first chain). In our pattern, it says to work a SCINC in that chain so we will create 2 single crochet stitches in that chain.
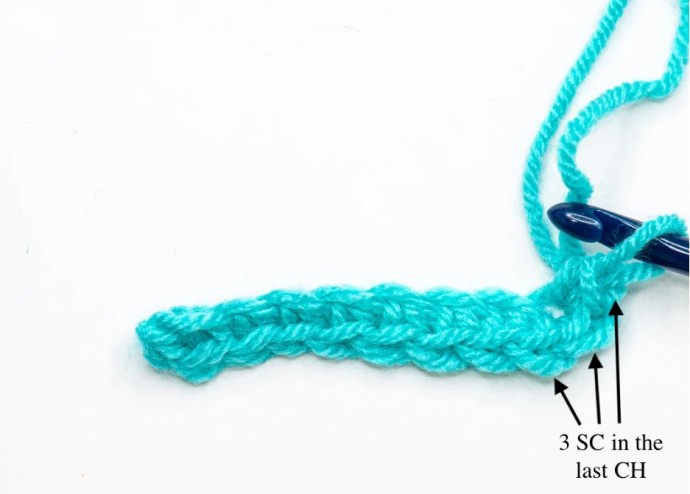
Work the next set of instructions (SC in the next CHs). When you get to the last chain, you’ll create multiple stitches in that last chain to turn your work. In our pattern, we’ll work 3 SC stitches into that last chain.
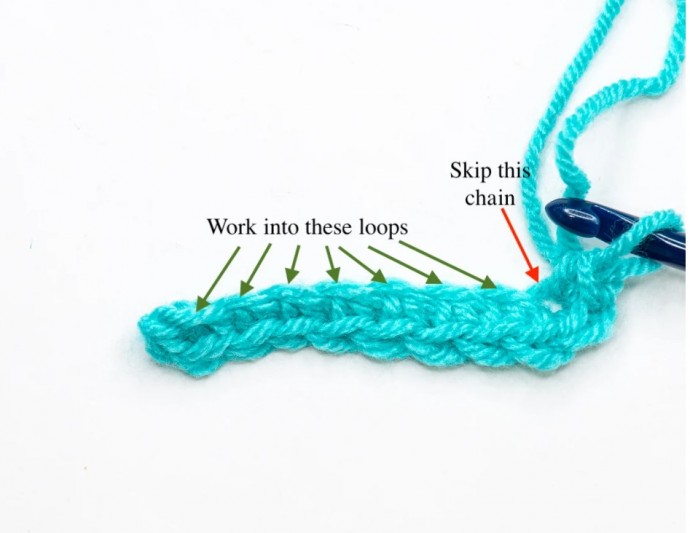
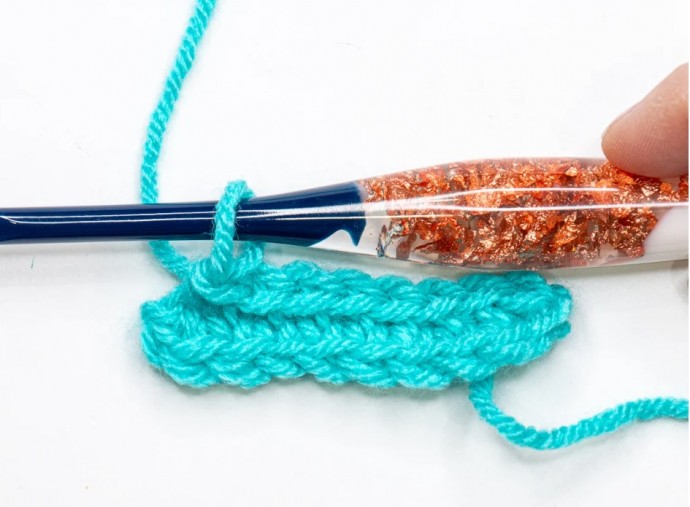
Now we’ll turn our chain. You should see some loops under the first set of stitches you created. This is the remaining, unworked front loops of the foundation chain.
When working into the bottom of a chain like this, you want to make sure that you’re skipping the last chain because you’ve already worked into that with your 3 SC stitches. Starting in the second chain, we’ll work our next set of instructions from our sample pattern: SC 7.
Tip 1: If you’re a tight crocheter and you find that working into these loops are too difficult, I’d recommend redoing your starting chain with a looser tension or even a larger hook size.
Tip 2: Always take time to count your stitches at the end of your first row / rounds to ensure you have the correct number of stitches before proceeding to the next Round. If your stitch count is off on your first row, then all subsequent rows will have issues.
Working Round 2
When starting Round 2, you’ll work under both loops of each stitch around as normal (except where the pattern indicates to work in a different location of the stitch)
NOTE: Make sure that you have a stitch marker, safety pin, hair pin etc. handy to place in the first stitch of this round. You’ll move this stitch marker up in each subsequent round.
Troubleshooting Gaps in the Chain When Working Around a Foundation Chain
Got gaps in the chain between both sides of your foundation row like the image below? This happens when you work your stitches under only the back loop of the chain and the front loop of the chain. Working into a single loop will stretch the chain, causing that gap.
How to fix it:
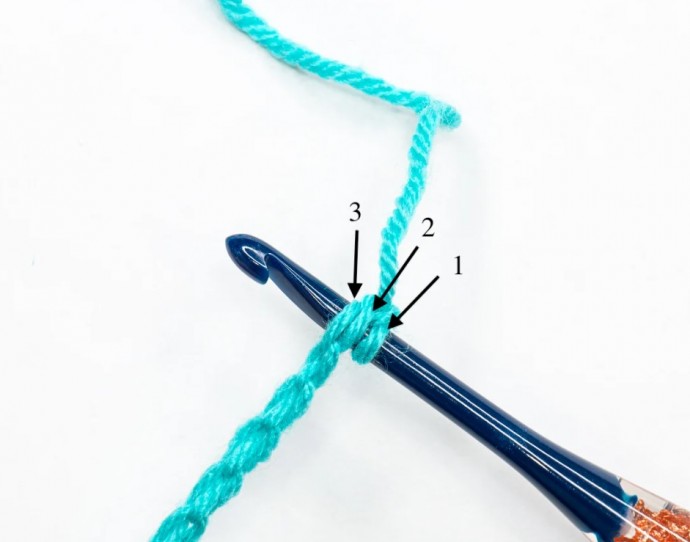
Always make sure that when you’re working into a foundation chain that you insert your hook under the back loops and the back bumps of the chain. You know that you have picked up both loops when you see 2 loops on your hook like in the image below. Just making this little change can make a big difference in the finished look of your projects.
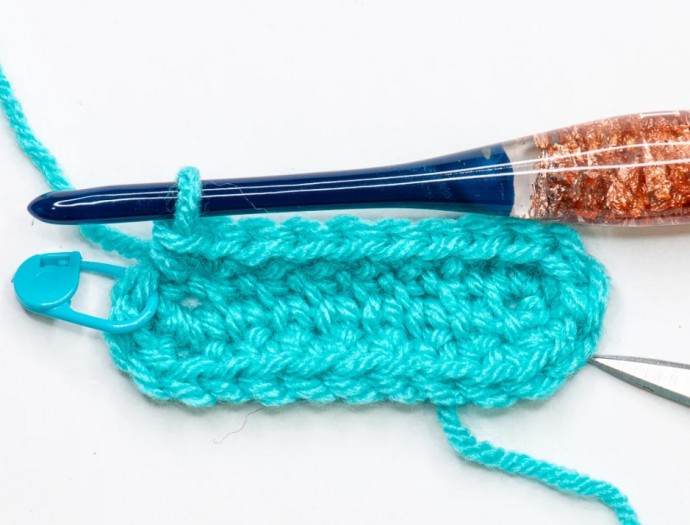
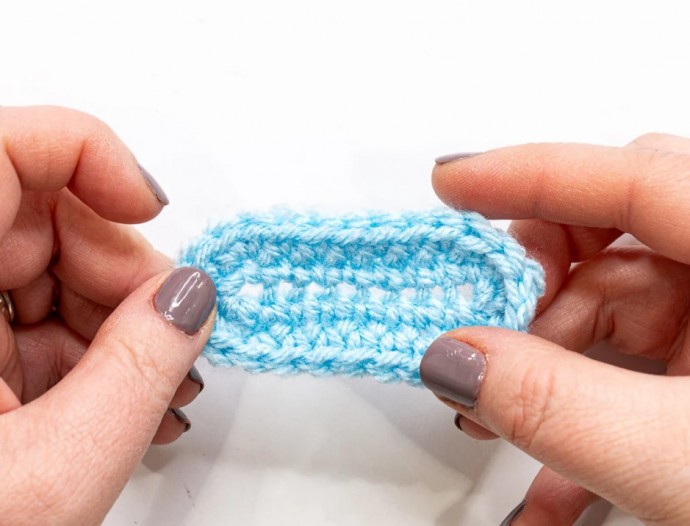
In the below images is a completed crochet oval that has been worked properly into both sides of the chain. But there is still another way you can do this and get even less of a gap however, you do loose some elasticity.
Way Two: You can turn your chain and only work into the back bump of the chains when you start your first side of the foundation chain. In the image below, shows the little back humps on the back of the chain.
When you turn to work on the opposite side of the piece, you’ll work under both remaining loops. The below oval has been worked into the back bumps of the foundation chain.