Chain Cables Stitch Crochet Photo Tutorial

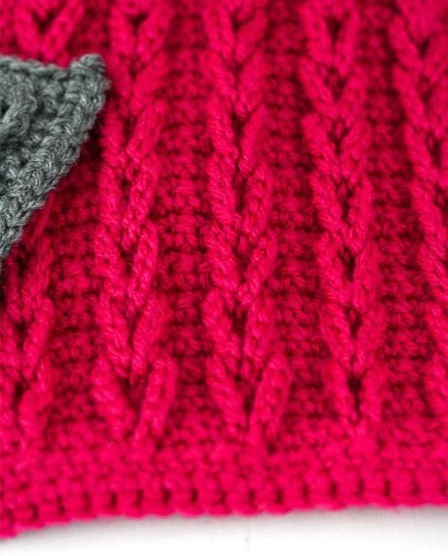
The chain cable stitch pattern uses only chains and single crochet to create a braided or cabled look. You won’t believe how easy it can be unless you see it.
The Chain Cables stitch only has texture on one side and can be used on any flat fabric.
Learn how to crochet the Chain Cable Stitch with this photo tutorial.
Materials:
- Size 4 Weight Yarn 23-160 yds depending on sample size
- Size H Crochet Hook
- Yarn Needle
- Scissors
Stitches and Abbreviations:
- Ch – Chain
- Sc – Single Crochet
- R – Row
- St(s) – Stitch(es)
Starting Chain:
When working Chain Cables you will want to Chain a multiple of 4 plus 1 for your starting chain.
Large (Blanket) 12 inch Swatch we will chain 45.
Medium (Book) 8 inch Swatch we will chain 33.
Small (Block) 4 inch swatch we will chain 17.
Instructions:
Note: I do not count my turning chain as a stitch.
Ch 17, 33, or 45 depending on the size sample swatch you would like to make.
R1: Sc in the second Ch from the hook and each Ch across.
R2: Ch1, turn, Sc in the first 2 sts, Ch12, *Sc in the next 4 sts, Ch 12* repeat from *to* until the second to last st. Sc in the last 2 sts.
R3: Ch1, turn, Sc in each stitch across, skip all chains. (This will cause the chains to become loops.)
R4-6: Ch1, turn, Sc in each stitch across.
Repeat Rows 2-6 until your project is as long as you want it. Then continue to the last row.
Follow the photo instructions below to braid your loops together before completing the last row.
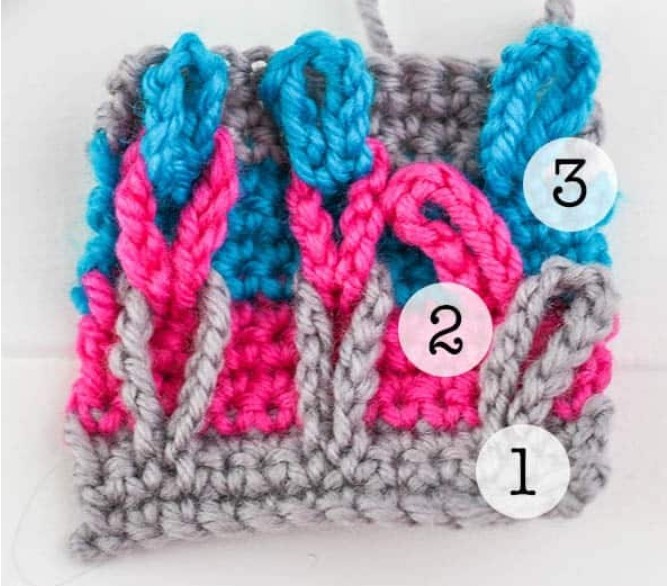
To make this easier I have labeled the loops with numbers. Gray loop is Loop 1, Pink is Loop 2, and Teal is loop three.
To braid you loops together you will start with the bottom loop, or loop 1 and pull loop 2 through loop 1. You can see in the first photo that the pink loop (loop 2) has been pulled through loop 1 (grey loop).
Then you will move up the braid and pull loop 3 through loop 2 (teal through the pink loop).
If you had more loops, the pattern would continue, pull loop 4 through loop 3, loop 5 through loop 4 and so on.
Braid together all your loops and then continue to the last row, where you will be single crocheting through the loop to secure the top loop.
Last Row: Ch1, turn, Sc in the first two stitches, Sc in the next stitch pulling up your loop through the chain loop, *work a Sc in the next 3 stitches, Sc in the next stitch pulling up your loop through the chain loop,* repeat until the last stitch. Sc in the last stitch.
For the 12 inch square work until you have a total of 62 rows.
To make a 8 inch square work until you have a total of 38 rows.
For the 4 inch square work until you have a total of 18 rows.


