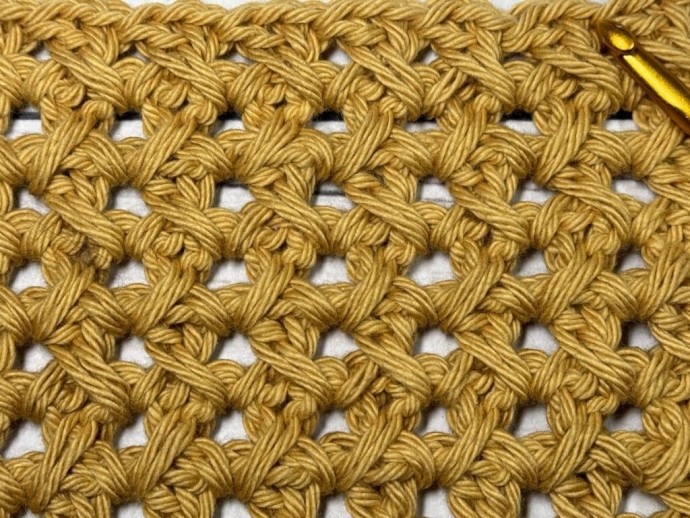
How to Crochet the Spiked Crossed Stitch Photo Tutorial

If you are looking for a robust openwork crochet stitch pattern, the Spiked Crossed Stitch crochet pattern is it!
This is one tough stitch that you are going to love! The Spiked Crossed stitch pattern uses standard crossed double crochet stitches, but worked in spaces between the two crossed double crochet stitches below. The result is a tightly crocheted fabric, that, as it is not completely solid in design, it still has some drape to it.
This crochet stitch would work well in a variety of projects. I am itching to try it in a crochet market bag. It’s tough, and doesn’t have a lot of stretch to it so I believe it would be a good candidate!
Learn how to crohet the Spiked Crossed Stitch with this photo tutorial.
Stitches and Abbreviations:
- Ch – Chain Stitch
- Dc – Double Crochet
- Rpt – Repeat
- Sc – Single Crochet Stitch
- Sl St – Slip Stitch
- Yo – Yarn Over
Pattern Notes:
This stitch is worked in rows in this tutorial and it may be worked in one colour or many. I will be working this pattern in a solid colour.
To begin make a slip knot and make a foundation chain. For this stitch you will need a multiple of three chains, plus two (3 + 2) for your foundation chain. Note that for this stitch pattern you will want to work a much longer chain than the desired width of the project. Due to the crossed nature of the stitches, the fabric will shorten the foundation chain quite a bit as your work progresses.
For example, ch 32.
Pattern Instructions:
Row One: Sc in the 2nd ch from your hook, *ch 2, sk the next 2 sts, sc in the next st; Rpt from * across ending with a sc in the final st. Ch 3, turn.
Row Two: Sk the 1st ch-2 sp, dc in the next ch-2 sp, ch 1, now crossing over the previous dc, dc in the previous skipped ch-2 sp, *dc in the next ch-2 sp, ch 1, now crossing over the previous dc, dc in the same sp as the previous crossed dc; Rpt from * across, dc in the final sc. Ch 3, turn.
Row Three: Sk the 1st sp between the ch-st and the 1st crossed dc, *dc in the next sp between the next two crossed sts, ch 1, now crossing over the previous dc, dc in the previous skipped sp; Rpt from * across, dc in the top of the turning ch. Ch 3, turn.
And that’s it!
For the rest of the pattern, simply repeat row three for the pattern. Fasten off, weave in your ends.


