How To Crochet Crab Stitch Photo Tutorial

The crochet Crab Stitch or the Reverse Single Crochet is such a beautiful crochet stitch to finish off crochet projects or even knit projects.
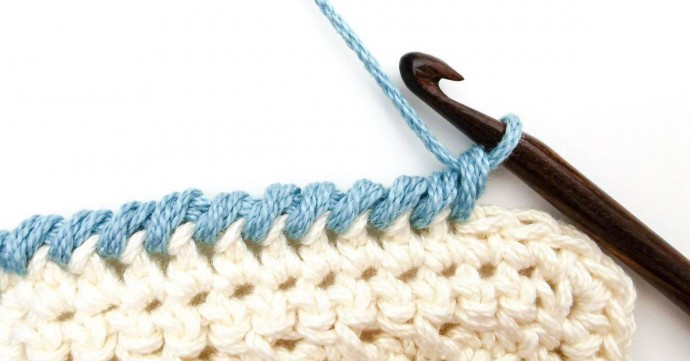
It creates the crochet crab stitch border or you could also call it a single crochet border. It is really simple, but at the same time looks really good.
The final look of the Crab Stitch edging resembles the look of a rope or twisted cording, which has a beautiful texture.
Let’s dive into the crochet stitch tutorial!
Materials:
- Crochet hook: 6 mm / US: J – 10 / UK: 4
- 4 Medium Yarn
Abbreviations:
- crab st = crab stitch
- reverse sc or rsc= reverse single crochet
- st = stitch(es)
Notes:
- This pattern is a multiple of 1 stitch & can be used as edging for any crochet project.
Instructions:
Start a row of the reverse single crochet with a turning chain of 1 chain stitch.
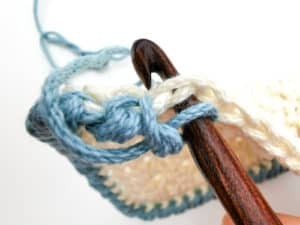
To start the stitch, you need to work into a previously crocheted row or foundation row. Notice that the yarn and crochet hook are to the left, while the stitch you are going to insert the crochet hook into are on the right side.
(Crochet tips: The above steps are for righties, where you hold the crochet hook in the right hand. But for lefties this will be done mirrored. With the crochet hook to the right and stitch to the left.)
Move the hook to the right and you are ready to insert the hook into the stitch to the right.
(For left-handers this will be done to the left.)
Insert the crochet hook into the crochet stitch to the right on previous row.
(To the left for left-handers.)
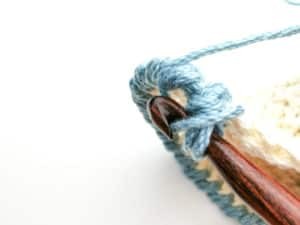
Yarn over, you are now ready to pull the yarn through the stitch.
Pull up a loop through the stitch. You have 2 loops on your crochet hook.
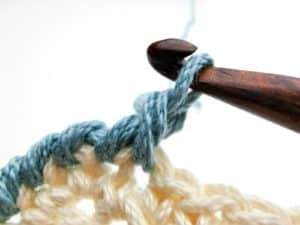
Yarn over. Place the yarn around the previous stitch for the best result. As seen in the photos below, the previous stitch is directly to the left for the yarn over strand.
Pull the yarn through both loops on hook.
You’ve made 1 stitch! Repeat the entire process in next stitch to create more. With a little practice this stitch will become easy.
Continue to repeat step 1-8 until you have worked around the whole edge of your work for a simple finished edge.