How to Crochet the Circle Stitch Photo Tutorial

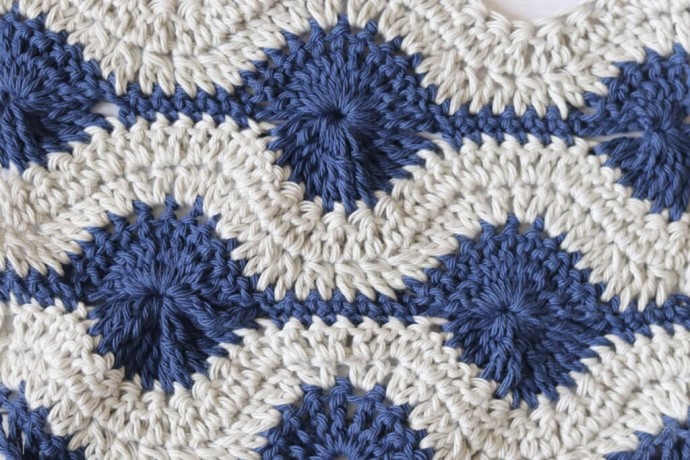
The Crochet Circle Stitch is a wonderful crochet stitch pattern that can be worked in one colour or in many.
This stitch looks pretty and it is the same on both sides. It would look amazing in a larger project, such as a crochet afghan, where the colour pattern is truly able to shine.
Learn how to crochet the Circle Stitch with this photo tutorial.
Materials:
- crochet yarn
- 5 mm crochet hook
Stitches and Abbreviations:
- Ch – Chain
- Dc – Double Crochet
- Dc2tog – Double Crochet Two Stitches Together
- Rpt – Repeat
- Sc– Single Crochet
- Tr – Triple/Treble Stitch
- Tr6tog – Triple Crochet Six Stitches Together
- Tr12tog – Triple Crochet Twelve Stitches Together
- Yo – yarn over
Instructions:
To begin you will make a foundation chain with a multiple of 15 + 7 stitches.
For example, ch 37
Row One:
Sk the first 5 chs, 6 tr in the next ch, * sk the next 4 chs, sc in each of the next 6 chs, sk the next 4 chs, 12 tr in the next ch; Rpt from * across to the final 12 sts, sk the next 4 chs, sc in each of the next 6 chs, 6 tr in the next ch, 1 tr in the final ch. Ch 3, turn. Change colour if desired.
Row Two:
Sk the 1st st, * 2 dc in each of the next 3 tr sts, work 6 dc2tog over the next 12 sts, 2 dc in each of the next 3 tr sts; Rpt from * across, dc in the top of your turning ch. Ch 3, turn.
Row Three:
Sk the 1st st, * 2 dc in each of the next 3 sts, work 6 dc2tog over the next 12 sts, 2 dc in each of the next 3 sts; Rpt from * across, dc in the top of your turning ch. Ch 1, turn. Change colour if desired.
Row Four:
Sc in the 1st st, *sc in each of the next 3 sts, ch 5, tr12tog over each of the next 12 sts, ch 5, sc in each of the next 3 sts; Rpt from * across, sc in the top of your turning ch. Ch 1, turn.
Row Five:
Sc in the 1st st, *sc in each of the next 3 sts, work 12 tr in the top of the tr12tog, sc in each of the next 3 sts; Rpt from * across, sc in the final st. Ch 3, turn. Change colour if desired.
Row Six:
*Work 3 Dc2tog over the next 6 sts, 2 dc in each of the next 6 tr sts, work 3 dc2tog over the next 6 sts; Rpt from * across, sc in the final st. Ch 3, turn.
Row Seven:
*Work 3 dc2tog over the next 6 sts, 2 dc in each of the next 6 sts, work 3 dc2tog over the next 6 sts; Rpt from * across, dc in the top of your turning ch. Ch 5, turn. Change colour if desired.
Row Eight:
Tr6tog over the next 6 sts, ch 5, sc in each of the next 3 sts, *sc in each of the next 3 sts, ch 5, tr12tog over the next 12 sts, ch 5, sc in each of the next 3 sts; Rpt from * across until 10 sts remain, sc in each of the next 3 sts, ch 5, tr6tog over the next 6 sts, tr in the top of your turning ch. Ch 5, turn.
Row Nine:
Work 6 tr in the top of the tr6tog, sc in each of the next 3 sc, *sc in each of the next 3 sc, work 12 tr in the top of the next tr12tog, sc in each of the next 3 sc; Rpt from * across, sc in each of the next 3 sc, work 6 tr in the top of the final tr6tog, tr in the top of the turning ch. Ch 3, turn. Switch colours if desired.
And that’s it!
For the rest of the pattern, repeat rows 2-9 for as long as you would like. Fasten off, weave in your ends.


