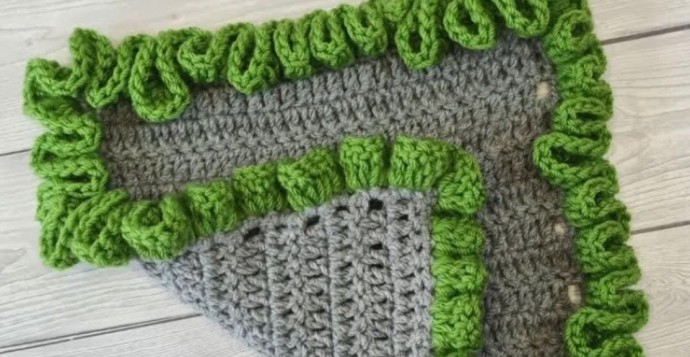
Crochet Ruffled Edge Blanket Border Photo Tutorial

The Ruffled Edge Blanket Border must be one of the easiest ways to decorate your blanket. If you are looking for a quick way to create some texture around your design, this is definitely the one to try.
The Ruffled Edge Border is constructed with multiple double crochet stitches crocheted in each stitch around the edge, resulting in a curly and textured border.
It doesn’t require a special pattern for corners and that makes it a beginner-friendly pattern that can be adjusted to any project.
Learn how to crochet the Ruffled Edge Blanket Border with this photo tutorial.
Materials
- Marriner Yarns Aran
- 5mm crochet hook
Abbreviations
- st(s) – stitch(es)
- ch – chain
- sl st – slip stitch
- dc – double crochet
Notes
- TIP: If you want a less curly border or you are using a thicker yarn, make 4dc in each stitch. If you want a fuller border or you are using thinner yarn, make 6dc in each stitch.
- the section between ** is the section that needs to be repeated
- this border is crocheted in the round without turning, each round is closed with an sl st
Instructions
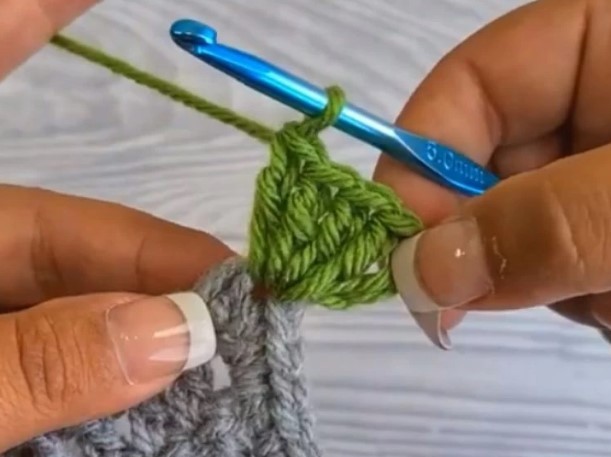
Step 1: Join in any stitch around the edge with a slip knot and ch3 (counts as a dc), 4dc in the same stitch.
Step 2: 5dc in the next stitch.
Step 3: Repeat Step 2 in each stitch around the edge, sl st in the top chain of ch3 you made at the beginning, and fasten off.
Shaping Up The Border: The ruffles will curl unevenly and you might want to shape them up with your fingers to get an even curl.
Use your thumb to roll the border around and create equal-length ruffles around the border.


