How to Crochet in the Back Bumps of a Chain Tutorial

Knowing how to crochet into the back bumps of a chain is a great skill to have in your crochet toolbox. This technique can help clean up the bottom of your work so that it matches the top of your work and it used in various different ways for improving the look of the bottom of a chain. Today I’ll show you how to crochet into the back bumps of a chain with both a photo tutorial so you can feel confident with your new skill.
Why Should I Crochet Into the Back Bump of the Chain?
There are different ways to work into a crochet chain and where in the chain you work your foundation stitches, will chain the look of your foundation row. Here is the main reason why many crocheters work into the back bump of a chain: They want both edges of their project to look the same!
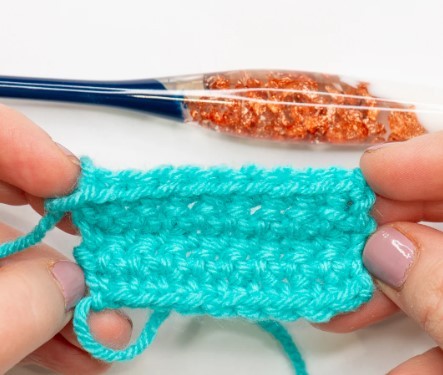
When you work into a crochet chain the standard way, the top edge of your crochet project looks different than the bottom edge. The top of your project typically has this nice row of clean V’s across the top but your foundation row at the bottom of the work doesn’t. Working into the back bump of the chain can help make your bottom edge and top edge look the same or at least, more similar.
Parts of a Crochet Chain
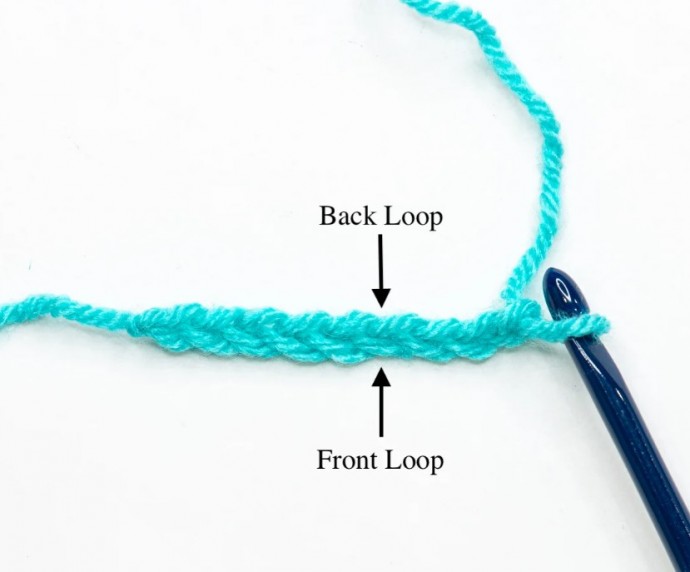
Before we learn the back bump technique, we need to understand the anatomy of a crochet chain. When the front of the chain is facing you, it is easy to see that there are 2 loops of the chain facing you.
The front loops are the ones closest to you (in the image, it’s the bottom loop) and the top loop / the loop furthest from you are known as the back loops.
But there is a third loop that is hidden from view when you’re looking at the front of the chain. To see it, we need to turn the chain over so we are looking at the back side of the chains.
Once the chain is turned over, you’ll see that there are these little bumps (sometimes called back humps or back bar) along the back of the chain. This single strand on the back of your chain stitches is the back bump of the chain.
How to Crochet in the Back Bumps of a Chain
1. With a slip knot on your crochet hook, create a crochet chain of your desired number of chains.
2. Turn the chain so you’re looking at the back of your foundation chain and locate the back bump in the 2nd chain from the hook.
3. Insert your crochet hook under the back bump of the 2nd chain from the hook and complete your stitch as normal. In this example I’ve done a single crochet stitch.
4. Repeat this process, working your stitches into the back bump of the chain until the end of your chain. You’ll crochet the rest of your rows as normal.
Note: In this example, I have shown you how to do a single crochet stitch in the back bump of the starting chains however, depending on the stitch you need to work, you may need to adjust which chain that you work your first stitch into (i.e. typically a double crochet stitch would be done in the 4th chain from the hook and those skipped chains would count as your first stitch or turning chain while single crochet stitches are typically worked in the 2nd chain from the hook.)


