How to Crochet The Jasmine Stitch Photo Tutorial
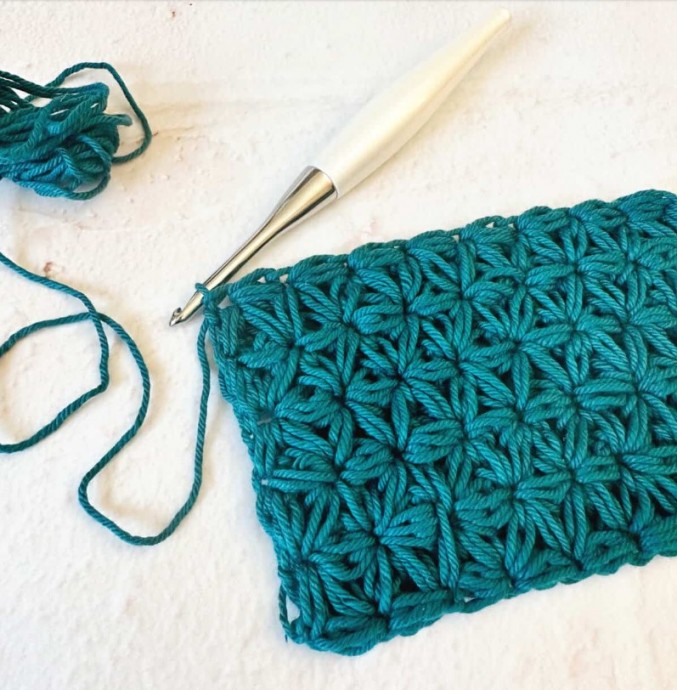
The crochet jasmine stitch is made with clusters of puff stitches. Once you’ve worked a few rows they’re grouped to resemble the jasmine flower.
The beauty of this stitch is that it’s a reversible stitch. It looks the same on both the right side and wrong side of your work.
Learn how to crochet the Jasmine Stitch with this photo tutorial.
Materials
- #4 medium worsted weight yarn I'm using Dishie Yarn (100% cotton, 190 yd / 100 g).
Tools
- 5 mm hook (US Size H-8), or crochet hook to match your yarn.
Instructions
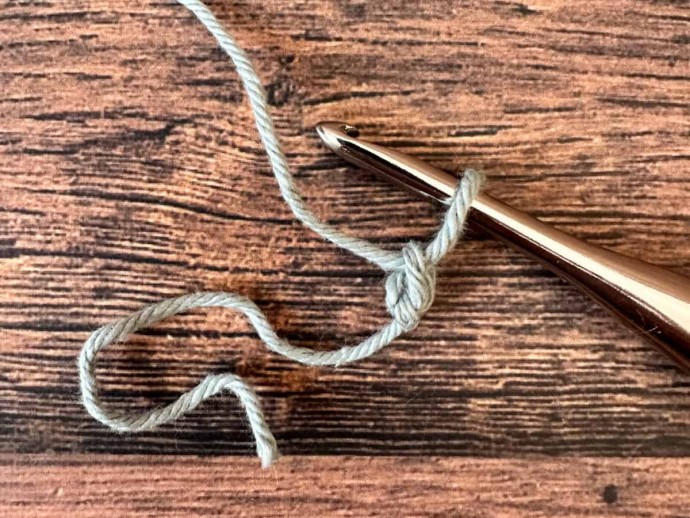
1. Start with a slip knot on your hook. Row 1. Ch 1
2. Pull up the loop on your hook so it's about as tall as a double crochet. First we'll make the foundation puff row.
3. Yarn over and insert the hook in the first ch.
4. Yarn over and pull up a loop.
5. Yarn over and inset hook into same spot again.
6. Hold the working yarn at the base of the stitch. You'll need to keep holding this spot through the next steps as you will work into it afterwards.
7. Yarn over, keep hold of the yarn at the base of the stitch.
8. Pull through all 5 loops on your hook, keep holding the yarn at the base.
9. Insert the hook into the loop you've been holding at the base.
10. Yarn over
11. Pull up a loop
12. Yarn over
13. Pull through both loops on your hook. One jasmin stitch completed.
14. Pull up a long loop.
15. Yarn over and insert hook into same stitch you just made, pull up a loop.
16. Repeat last step again
17. Hold yarn at base of stitch, yo and pull through all 5 loops on your hook.
18. Insert hook into held loop, yo and pull up a loop, yo and pull through both loops to complete another jasmin stitch.
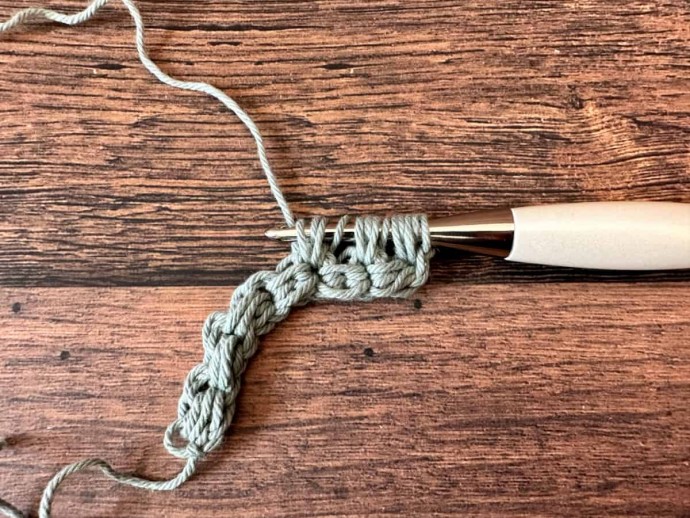
19. Repeat steps 15 - 18 to create a chain of puff stitches. Here my stitch count is 6. Work to the desired width of your project.
The last foundation puff stitch will be a turning stitch for our next row.
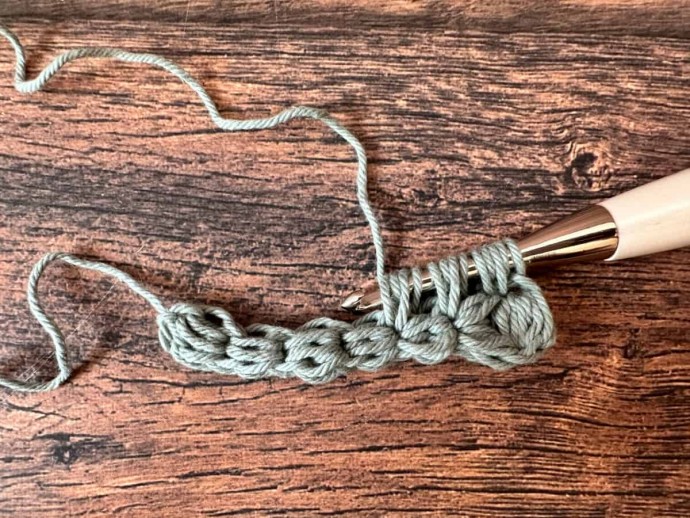
20. Row 2. Pull up a long loop, yo and insert hook in same st, yo and pull up a loop, yo and insert hook in same st, yo and pull up a loop
21. Keeping these 5 loops on your hook, yo and insert hook in next st between puff sts, yo and pull up a loop 2X to add 4 more loops on your hook (9 total).
22. Yo and insert hook in next st, yo and pull up a loop 2X to add 4 more loops to your hook for a total of 13 loops on your hook.
23. Hold working yarn at base of last st, yo and pull through all 13 loops.
24. Insert hook into spot at base you were holding, yo and pull up a loop.
25. Yo and pull through both loops on hook. This completes your first st.
26. Starting in the same stitch and working over the next two sts repeat steps 20 - 22.
27. Rep step 23.
28. Rep step 24.
29. Finish it by repeating step 25.
30. Starting in the same stitch follow step 20.
31. Rep step 21.
32. Rep step 22.
33. Finish by repeating steps 23 - 25.
34. Continue to repeat steps 20 - 25 across the row.
35. When you get to the last stitch at the end of the row
36. You will work the stitch normally
37. Ending in the very first stitch you made
38. After you complete the last stitch
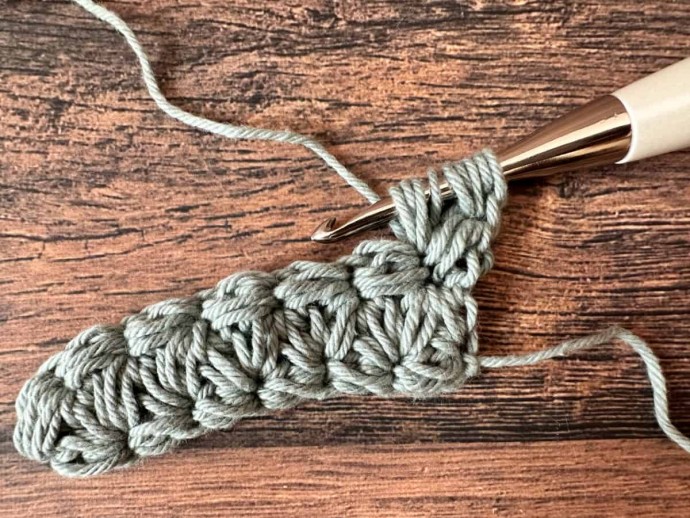
39. Turn your work and pull up a long loop to start Row 3.
40. You will start each row with a single finished jasmine stitch, it serves as a turning chain to get us started on a new row. Yo and insert hook into same st, yo and pull up a loop.
41. Yo and insert hook back into same st, yo and pull up a loop.
42. Continue by holding the yarn at the base, yo and pull through all 5 loops..
43. Close the first stitch by inserting the hook in the loop you're holding, yo and pull up a loop (2 loops on hook), yo and pull through those 2 loops. You will start each new row this way.
44. Follow steps 20 -25. Start in the top of the stitch you just made. 5 loops.
45. Work into the base of the stitch next.
46. Work into the base of the following st.
47. Finish the stitch.
48. Keep working them across the row.
49. The ending jasmine stitch is worked the same.
50. Start where you are,
51. Continue to next st,
52. Finish in last puff st at end of your row.
53. Close the last jasmine st the same way.
54. Continue to repeat row 3 for the next row and for the length of your project.
55. To finish off, after the last cluster you close it as you normally would, then pull up a long loop and cut a tail of at least 6". Pull it through the last stitch.
56. Weave in end your ends.

