How to Crochet the Rosebud Stitch Photo Tutorial

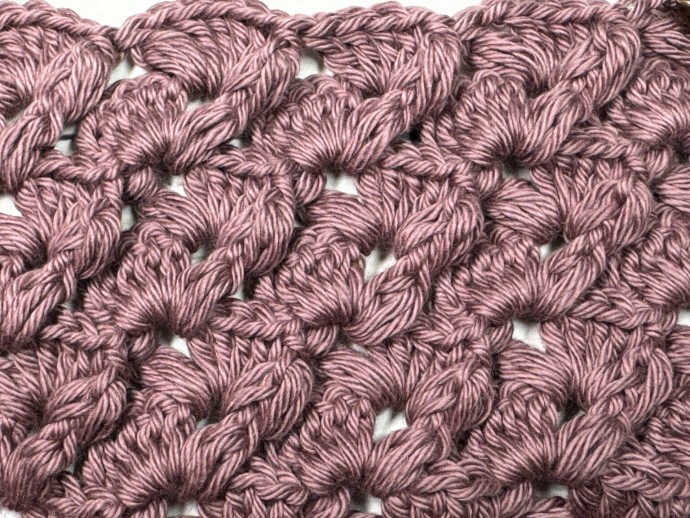
The Rosebud Stitch crochet pattern is a beautiful, textured design that is an easy one row repeat!
I love this stitch pattern! It is made up of a combination of puff stitches that are sometimes worked in chain spaces and sometimes worked around posts, and double crochet stitches. It’s really not that complicated when you get the hang of it!
I have already mentioned that it is a simple one row repeat and it really has a good rythym to it once you get going. The other great feature about this stitch is that it is the same on both sides which makes it a great canidate for those reversible projects.
Learn how to crochet the Rosebud Stitch with this photo tutorial.
Abbreviations
- Ch – Chain Stitch
- Dc – Double Crochet
- Fp Puff – Front Post Puff Stitch (Work a puff stitch by bringing your hook in front of your work and insert your hook around the post of the indicated stitch from front, around back and out through the front again.)
- Puff St – Puff Stitch ([yo, insert your hook in the indicated st/sp, yo and draw up a loop] 3 times, yarn over and draw through 5 loops, yo and draw through the remaining 2 loops. Puff Stitch made.)
- Rpt – Repeat
- Sc – Single Crochet Stitch
- Sl St – Slip Stitch
- Spiked hdc – Spiked Half Double Crochet (Work a hdc st inserting your hook in the space under the next st)
- Yo – Yarn Over
Notes
- This stitch is worked in rows in this tutorial and it may be worked in one colour or many. I will be working this pattern in a solid colour.
- To begin make a slip knot and make a foundation chain. For this stitch you will need a multiple of 6 + 3 chain stitches for your foundation chain. For example, ch 33.
Instructions
Row One: Work [4 dc, ch 1, puff] in the 6th ch from your hook, *sk the next 5 sts, [4 dc, ch 1, puff] in the next chapter; Rpt from * across until 3 sts remain, sk the next 2 sts, dc in the final st. Ch 3, turn.
Row Two: Fp puff working around the post of the 1st puff st, [4 dc, ch 1, puff] in the next ch-1 sp, *fp puff around the post of the next puff st, [4 dc, ch 1, puff] in the next ch-1 sp; Rpt from * across, dc in the top of the turning ch. Ch 3, turn.
And that’s it!
For the rest of the pattern, simply repeat row two. Fasten off, weave in your ends.


